Welcome to my 1st OHCC! If there is interest, I hope to do a couple
more workshops of this card this month.
I forgot to take pictures of my students being creative in my first
class but I remembered to take a couple in my second class! Anyways, lots of fun!
All supplies are from
the ‘Share the Fun’ 2015 – 2016 big catalogue unless otherwise stated.
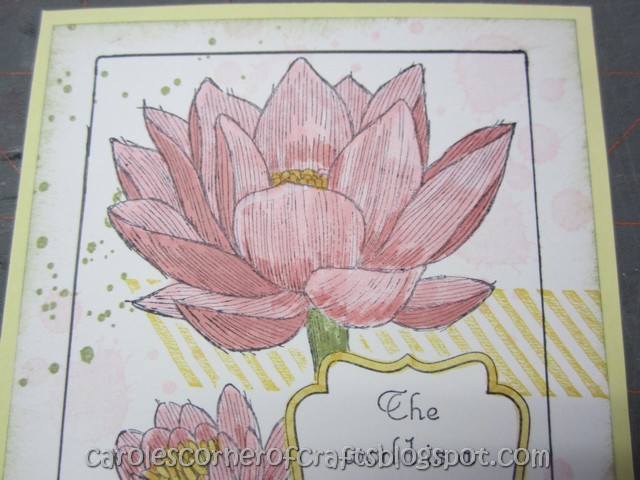
Stamp Sets: Gorgeous
Grunge page 123, Banner
Blast (retired), Work of Art page 118, Teeny Tiny Wishes page 95, Groovy Love
page 20, Holiday Best (retired), signature stamp (like Creatively Yours page
63) or use an address label.
Accessories: Stamping Sponges page 163, bone folder
page 164, scissors page 168, Snail Adhesive page 156, Stampin’ Trimmer page
169, Stampin Dimensionals page 156, Bakers Twine page 158, Wink of Stella brush
in clear – from the Occasions Catalogue (January to May, 2016), scotch tape,
homemade envelope template.
Punch:
Sweetheart page 166, Word Window page
166, Large Oval page 165, Itty Bitty Pack page 166.
The measurements are as follows: Melon Mambo
cardstock at 5.5” x 8.5” then fold in half for the card; a panel 5” x 3-3/4”
from Basic Black
cardstock; a panel 4-3/4” x 3-1/2” from Whisper White cardstock and a panel at
5.25” x 4” from white cardstock for the inside of the card.
This student is in the process of attaching her insert to the inside of her card.
There are a lot of phrases in the Teeny Tiny Wishes stamp
set – Happy Anniversary, Happy Birthday, Best Wishes and on and on! You can switch it up to suit you
How to make a homemade envelope - Back in the day when I
started making cards, there was no such thing as envelope templates that you
could buy so I created my own. It is
still my favorite way of making them today!
I never did break down and buy one neither! So here it is: Make yourself a cardboard template by
first cutting the cardboard 8” high by 5.75” wide. The sides are about 5” high. Cut another piece of cardboard at 4/3/8” high
x 5-3/4” wide.
Cut any kind of paper 8-1/4” square. Place the point of the cardboard template into one point of the paper.
Fold the sides in to hug the cardboard template. Pull tight and crease.
Bring up the bottom to fit tightly to the cardboard and
crease.
Remove this template.
Place the smaller template tight to the bottom fold.
Then fold down the top flap.
Crease.
Remove template.
Press all 4 folds using the bone folder.
Bend the bottom corner
back.
Cut with decorative
scissors.
Clip the 4
triangle corners where the two
fold lines meet.
Open the bottom flap and run snail or glue along these
edges and press up (except the decorative edge).
Stamp the front as you
desire to match the card.
There is an excellent Fork Bow tutorial HERE.
This student is pressing her fork bow into her puddle of
glue using the fork.


Welcome to my 1st OHCC! If there is interest, I hope to do a couple
more workshops of this card this month.
I forgot to take pictures of my students being creative in my first
class but I remembered to take a couple in my second class! Anyways, lots of fun!
All supplies are from
the ‘Share the Fun’ 2015 – 2016 big catalogue unless otherwise stated.
Stamp Sets: Gorgeous
Grunge page 123, Banner
Blast (retired), Work of Art page 118, Teeny Tiny Wishes page 95, Groovy Love
page 20, Holiday Best (retired), signature stamp (like Creatively Yours page
63) or use an address label.
Accessories: Stamping Sponges page 163, bone folder
page 164, scissors page 168, Snail Adhesive page 156, Stampin’ Trimmer page
169, Stampin Dimensionals page 156, Bakers Twine page 158, Wink of Stella brush
in clear – from the Occasions Catalogue (January to May, 2016), scotch tape,
homemade envelope template.
Punch:
Sweetheart page 166, Word Window page
166, Large Oval page 165, Itty Bitty Pack page 166.
The measurements are as follows: Melon Mambo
cardstock at 5.5” x 8.5” then fold in half for the card; a panel 5” x 3-3/4”
from Basic Black
cardstock; a panel 4-3/4” x 3-1/2” from Whisper White cardstock and a panel at
5.25” x 4” from white cardstock for the inside of the card.
This student is in the process of attaching her insert to the inside of her card.
There are a lot of phrases in the Teeny Tiny Wishes stamp
set – Happy Anniversary, Happy Birthday, Best Wishes and on and on! You can switch it up to suit you
How to make a homemade envelope - Back in the day when I
started making cards, there was no such thing as envelope templates that you
could buy so I created my own. It is
still my favorite way of making them today!
I never did break down and buy one neither! So here it is: Make yourself a cardboard template by
first cutting the cardboard 8” high by 5.75” wide. The sides are about 5” high. Cut another piece of cardboard at 4/3/8” high
x 5-3/4” wide.
Cut any kind of paper 8-1/4” square. Place the point of the cardboard template into one point of the paper.
Fold the sides in to hug the cardboard template. Pull tight and crease.
Bring up the bottom to fit tightly to the cardboard and
crease.
Remove this template.
Place the smaller template tight to the bottom fold.
Then fold down the top flap.
Crease.
Remove template.
Press all 4 folds using the bone folder.
Bend the bottom corner
back.
Cut with decorative
scissors.
Clip the 4
triangle corners where the two
fold lines meet.
Open the bottom flap and run snail or glue along these
edges and press up (except the decorative edge).
Stamp the front as you
desire to match the card.
There is an excellent Fork Bow tutorial HERE.
This student is pressing her fork bow into her puddle of
glue using the fork.