 |
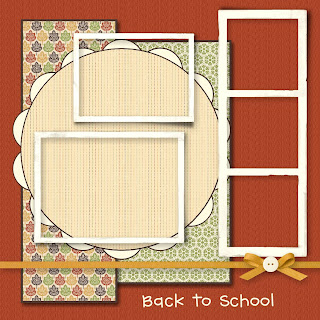
| Page before adding Photo boxes. |
Doesn't really feel like fall just yet but we'll do a Fall page anyways.If you have just stumbled on my Blog, type ‘MDS Scrap Page’ in the Search Box (top left corner) to see what we have been doing. I am using Windows 7 so you may need to click on HELP (across the top of the program), My Digital Studio Help if you are using a different Windows than me. Watch for NEW Scrap Pages posted every Friday.
Background paper – cardstock – Textured Cardstock – Cajun Craze.
Background paper - Designer Series Paper – Designer Kits – Autumn Spice #5 - Add as Page Layer – Double click & resize to 3.5 x 10” – ok - mat – Early Espresso – ok.
Background paper - Designer Series Paper – Designer Kits – Autumn Spice #1 - Add as Page Layer – Double click & resize to 4.5 x 9” - mat - Early Espresso – Arrange – send to back.
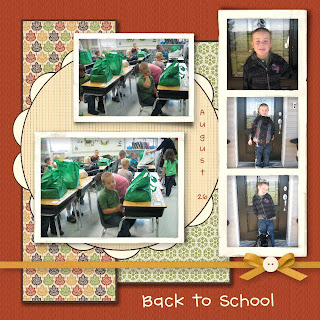 |
| This is a 12x12 page. |
Embellishment – grosgrain ribbon – More Mustard.
Embellishment – grosgrain bow – More Mustard.
Embellishment – round buttons – Very Vanilla.
Punch – scallop circle – resize quite large - color fill – Very Vanilla - mat - Early Espresso.
Punch – circle – resize to fit punch - paper fill – Autumn Spice #7 - mat - Early Espresso.
Embellishment – Designer Kits – Downtown Grunge – triple frame – rotate – resize.
Embellishment – Designer Kits – Downtown Grunge – one large & one small single frame.
Click on one Embellishment - Drop Shadow – Opacity 45 Blur 9 (or whatever you want) – on this page. Repeat by clicking on one Punch, then on one of your photos.
Text – CK Handprint – size 58 – change color – Very Vanilla.


