I have Charlsea from Maplelea modelling this outfit. For the dress, I used Susan Kramer’s
free jumper pattern - I can't see, to find it on her site now but maybe you can. I raised the neckline about 1/2" and raised the armhole about 1” to make the armhole
smaller. I also opened the center
back. I used mycupoverflows sleeve
pattern – I added about an inch onto the length of that.
Dress
Prep the sleeve by hemming the bottom
about ¼”.
Run a basting stitch at the top of each
sleeve and pull threads to gather.
Insert 5” of 1/8” elastic into hem
casing. Secure both ends. Set aside.
Apply about 4” of interfacing to each
center back at Velcro placement.
Press one side under ½” to serve as a
guide later on.
Sew shoulder seams, pink and press open.
I cut the neckband 1.5” wide by 10”
long. Sew, stretching slightly. Trim off excess neckband. Pink and clip. Topstitch towards the dress.
Sew about 2.5” of Velcro to the back
seams.
Sew center back closed about 4” from
bottom.
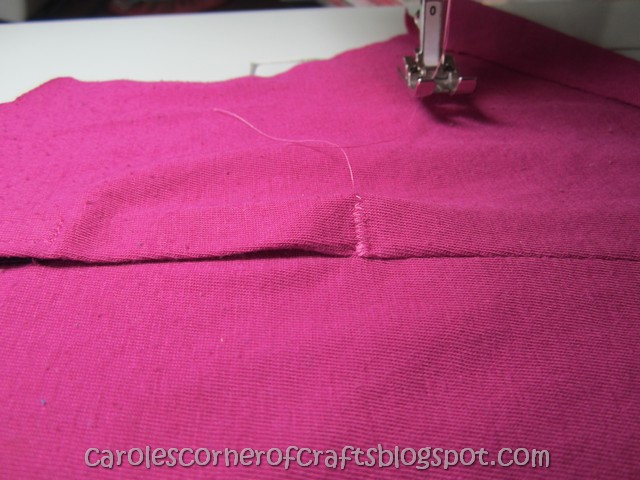
Press back seam to one side following the
same direction as your prefold. Bartack
at the top of the seam for a little extra security.
Attach sleeves. Pink and clip.
Sew the side seams. Clip and press. Hem bottom of dress at ½”.
Belt
I cut the belt 1.5” wide by 16” long,
sewed it into a tube, turned and pressed.
Fit to the doll. Trim off excess. Add a rhinestone buckle slider. Sew about 1” of Velcro to each end.
Infinity Scarf
There are lots of patterns for this on
Pinterest. I cut mine 4.5” wide by 26”
long. I’m using a different scarf than
the one that goes with this dress and that’s because I forgot to take
pictures! Anyways, I like to press about
4” of my fabric under as a guide for later – I’ve put pins to show you what I mean.
Fold the fabric into a tube with right
sides together but leave about 2” open on both ends.
Turn the tube right side out. Pin the two short ends together – be sure you
have the right sides together and sew.
Now, fold under the opening using your
pressed marks and pin.
Topstitch closed.
If you would like one, click "Like" on my 18" Doll Clothes Creations by
Carole Facebook page as the ordering info is there.
Stay tuned for more 18" doll clothes tutorials or better yet, sign up to my Blog so you won’t miss any of my posts!

I have Charlsea from Maplelea modelling this outfit. For the dress, I used Susan Kramer’s
free jumper pattern - I can't see, to find it on her site now but maybe you can. I raised the neckline about 1/2" and raised the armhole about 1” to make the armhole
smaller. I also opened the center
back. I used mycupoverflows sleeve
pattern – I added about an inch onto the length of that.
Dress
Prep the sleeve by hemming the bottom
about ¼”.
Run a basting stitch at the top of each
sleeve and pull threads to gather.
Insert 5” of 1/8” elastic into hem
casing. Secure both ends. Set aside.
Apply about 4” of interfacing to each
center back at Velcro placement.
Press one side under ½” to serve as a
guide later on.
Sew shoulder seams, pink and press open.
I cut the neckband 1.5” wide by 10”
long. Sew, stretching slightly. Trim off excess neckband. Pink and clip. Topstitch towards the dress.
Sew about 2.5” of Velcro to the back
seams.
Sew center back closed about 4” from
bottom.
Press back seam to one side following the
same direction as your prefold. Bartack
at the top of the seam for a little extra security.
Attach sleeves. Pink and clip.
Sew the side seams. Clip and press. Hem bottom of dress at ½”.
Belt
I cut the belt 1.5” wide by 16” long,
sewed it into a tube, turned and pressed.
Fit to the doll. Trim off excess. Add a rhinestone buckle slider. Sew about 1” of Velcro to each end.
Infinity Scarf
There are lots of patterns for this on
Pinterest. I cut mine 4.5” wide by 26”
long. I’m using a different scarf than
the one that goes with this dress and that’s because I forgot to take
pictures! Anyways, I like to press about
4” of my fabric under as a guide for later – I’ve put pins to show you what I mean.
Fold the fabric into a tube with right
sides together but leave about 2” open on both ends.
Turn the tube right side out. Pin the two short ends together – be sure you
have the right sides together and sew.
Now, fold under the opening using your
pressed marks and pin.
Topstitch closed.
If you would like one, click "Like" on my 18" Doll Clothes Creations by
Carole Facebook page as the ordering info is there.
Stay tuned for more 18" doll clothes tutorials or better yet, sign up to my Blog so you won’t miss any of my posts!