Friday, March 30, 2018

Calypso Coral Falling Flowers - One Hour Card Class 063 - OHCC063


Stamps: Watercolor Wash, Falling Flowers, Birthday Blossoms.

Cardstock: Calypso Coral, Watercolor paper.

Ink: Calypso Coral, Calypso Coral re-inker.

Tools: bone folder, Aqua Painter, Tombow adhesive, snail adhesive, White embossing powder, Multipurpose Adhesive Sheet, Calypso Coral ribbon, dimensionals, glue dot, purchased envelope, Scatter Sunshine Stampin Around wheel

Dies: May Flowers Framelits.

I found this card on Pinterest and used it as my guideline. 

I used the Stampin Around wheel (retired) to make the patterned paper.


I used the Watercolor Wash background stamp for the watercoloring then used very little water with the Aqua Painter to blend some of the ink.


Used the Stampin Around wheel to help decorate the inside of the card. 


Add a row of Scatter Sunshine flowers along the bottom of a purchased envelope.


If you have never made a card before, you will love these One Hour Card Class workshops!  We will complete a card with a matching envelope – ready for the mail!  I host card classes every Thursday, Friday and Saturday.  You pick the day and the time that suits you.  Message or email me for more info.  As a Stampin’ Up! demonstrator, I’m here to give you fun ideas, share specials & teach you about fabulous stampin products. Let's unleash your creativity!  You can order SU! products online and have them shipped directly to your door. Simply click on the “Shop Now” button in my banner (or I can order for you). I would be most happy to be your Canadian demonstrator.

Sunday, March 18, 2018

Google Sign


Lots of truth to this eh girls??  We will let them think it!  Haha!  “Google” approximate size 9-1/2” wide x 7-1/4 high.  More info on my FB page.  Hope you will follow along for updates as I post them by "Liking" my Here’s Your Sign Facebook page. 

Friday, March 16, 2018

More Brusho Cards - One Hour Card Class 046 OHCC046


This is card 3 of 3.  Card 1 is posted on my March 9 Blog post and card 2 is on my March 13 Blog post.

046C Embossing Folder and Brusho


Stamps: Birthday Blossoms (2017/18), Petite Petals (2016/17).

Cardstock: Dapper Denim, Daffodil Delight (YoYo Yellow), White, Old Olive, Watercolor.

Ink: Daffodil Delight, Memento black, Night of Navy.

Tools: paper piercer tool, Stampin Pierce Mat, spritzer, glue dots, gold metallic thread, Tombow glue, Petal Pair embossing folder (Occasions 2018), gold glitter glue, Sequins embossing folder, 3/8” Metallic ribbon (SAB 2017), Brusho crystals in Red, Blue, Yellow.

Punches: Pansy, Petite Petals.

I followed Leonie Schroder at Stamp A Latte’s video to do this card.  I had no luck with adding the white craft ink, so I left that part out.  I should have mopped up more water as I was looking more for a pastel look!

Sprinkle yellow, then a bit of red then a few touches of blue on the logo side of the Petal Pair embossing folder.  Lay the watercolor paper on the powder.  Run through the Big Shot. 


Carefully remove the watercolor paper from the embossing folder.  Lay on a napkin and spritz with water.  Lay another napkin on top.  Press lightly to mop up some water. 


Cut Brusho panel so it is 1-3/4” wide.  Butt the Sequins panel next to the Brusho panel.  Tape the top and bottom of the panels together.  Cut a strip of Dapper Denim to 3/8” and adhere on top of the brusho panel, barely covering the join.  Trim panel to 5-1/4” x 4”.  Add ribbon. 


For the flowers, I stamped 2 from the Birthday Blossoms stamp set and 5 from the Petite Petals stamp set on Daffodil Delight cardstock with Memento black ink, then punched them out.  Stamped and fussy cut the leaves.

Turn the flowers and leaves upside down on the Stampin Pierce Mat and spritz lightly with water. 


Break down the fibers by pressing down on each petal and the center with the end of your paper piercer tool, a rounded pen or a flower shaper tool.  Press the center of the leaves. 


Repeat from the right side of the flowers and leaves.  Set aside to dry completely. 


Once dry, adhere the two large flowers together and the four little flowers.  Add the last little flower to the center of the large flower. 


Add some gold metallic thread then add the flowers and leaves in a pleasing manner to the card front. 


Add gold glitter glue to the flower centers. 


Stamp a phrase in Night of Navy ink and the flowers in Daffodil Delight.  Adhere to inside of card. 


Decorate an envelope with the same flower images.  Run through the Sequins EF with the front of the envelope facing the logo on the EF. 


Tuesday, March 13, 2018

More Brusho Cards - One Hour Card Class 046 OHCC046


This is card 2 of 3.  Card 1 is posted on my March 9 Blog post and card 3 is on my March 16 Blog post.

046B Air Puffer and Brusho


StampsAmazing You (SAB 2018), Colorful Seasons (2017/18).

Cardstock: Tangerine Tango, Dapper Denim (Not Quite Navy), Gold Foil, Marina Mist, watercolor.

Ink: Versamark, Dapper Denim, Daffodil Delight, Pool Party.

Tools: Tombow glue, Pool Party Glitter ribbon or 3/8” Classic Weave Ribbon, glue dots, Air Puffer or a drinking straw or the Colour Spritzer tool, aqua painter, Brusho Crystals: Yellow, Prussian Blue.

Dies: Seasonal Layers Thinlits.

Set your watercolor panel on a napkin in a cardboard box to keep the crystals from getting puffed everywhere. The napkin collects the water.  


Squiggle a thin line of water diagonally using the aqua painter.  Add yellow crystals. 


Start puffing with the Air Puffer in all directions – the main job for this puffer is for cleaning lens, filters, musical instruments, computers, keyboards etc.  The puffing creates thin tendrils of color.  Mop up any water before going to the next step.  Do not use the puffer again for any of its main jobs as there could be crystals in it.


Add a puddle of water in the top, right hand side of the yellow.  Add blue crystals. 


Start puffing.  Repeat for the bottom left side of the yellow. 


Add more blue if desired in the white areas.  When you are satisfied, spritz very lightly with water and sprinkle with a few more blue and yellow crystals.  I like the look of the undissolved crystals myself! 


Once dry, run edge of the panel thro Night of Navy ink to give the illusion of it being mounted to cardstock.  


Stamp the tops of the die cut leaves with the sun rays from the Amazing You stamp set in Versamark ink to give texture to the leaves. 


Arrange leaves in a pleasing manner to the front of the card.  Cut ribbon 4” long.  Tie into a knot.


Add a phrase and some leaf images to the inside panel of the card.


Decorate an envelope with the same leaf images. 


Friday, March 9, 2018

More Brusho Cards - One Hour Card Class 046 OHCC046


Playing with the Brusho crystals again.  We tried 3 very different techniques for this class.  This is card 1 of 3.  Card 2 is posted on my March 13 Blog post and card 3 is on my March 16 Blog post. 

046A Embossing Paste and Brusho


Stamps: Flourishing Phrases.

Cardstock: Dapper Denim (Not Quite Navy), Powder Pink (Pink Pirouette), Berry Burst (Melon Mambo), Lemon Lime, watercolor paper.

Brusho Crystals: Prussian Blue.

Ink: Pink Pirouette, Night of Navy.

Tools: glue dot, Tombow glue, Embossing Paste, Fine Tip Glue Pen, Beautiful wings Embosslit (retired), Brusho Crystals in Prussian Blue.

Punches/Dies: Flourish Thinlits, 3/16” circle.

Apply embossing paste to 3-3/4” x 5” watercolor paper.  Let dry.  Add sprinkles of blue crystal then spritz with a fair bit of water.  Tip the panel to distribute the color. 


Immediately place a napkin over the entire panel to mop up the water. 

If you check online, you will find a lot of recipes for Embossing Paste.  This is the one I tried and have had great results with it.  It also lasts a long time in a sealed container.
1/4 cup talc or baby powder, 1 tablespoon white acrylic paint, 1 tablespoon Aleen’s original Tacky Glue.  Add a little water as needed to make a spreadable paste.

Adhere the large and medium flower together.  Curl petals. 


Punch a circle in Rose Red and add to center of flowers.  Cover center with Fine Tip Glue Pen. 


Die cut the butterflies using the Beautiful wings Embosslit in Pink Pirouette cardstock.  Adhere to the brick paste with glue dots. 


Stamp a phrase from the Flourishing Phrases stamp set in Night of Navy ink and the flower in Pink Pirouette ink.   Add a butterfly die.  Adhere to inside of card. 


Decorate an envelope with the same flower image.


Tuesday, March 6, 2018

February 2018 Paper Pumpkin Wildflower Wishes Alternative


The Wildflower Wishes kit is awash with brightly-hued florals that will help you send sweet spring greetings to everyone you know. The stickers and tags included with this kit feature images of real wildflowers, making it super-fun to play with—especially if you still have a foot of snow outside your door!

Each Wildflower Wishes kit comes with 9 card bases, 9 printed envelopes, 9 printed cardstock pieces, 4 sheets cardstock stickers, 3 sheets die-cut elements, 2 sheets vellum die-cuts, 9 yds. linen thread, 30 white pearls, 60 dimensionals, and 200 adhesive dots. As always, this Paper Pumpkin kit comes with an exclusive stamp set, plus a Garden Green ink spot, both of which you can save to use on future projects!

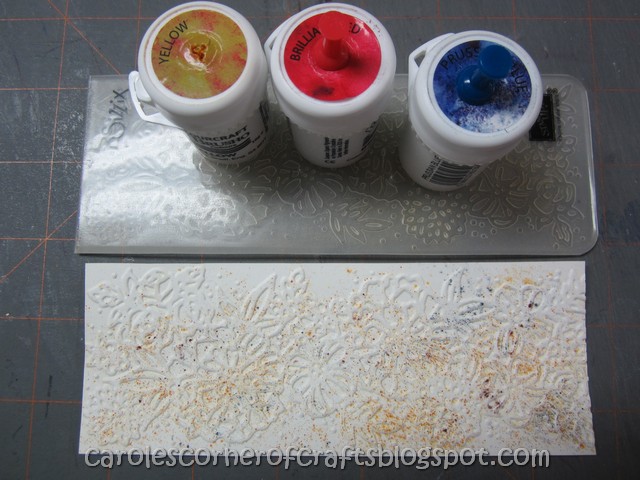
These are the extras I used for the cards.  All other items were supplied in the Wildflower Wishes February 2018 Paper Pumpkin kit.

Card 1 of 6 - Thank You.


Ink: Melon Mambo, Garden Green.

Tools: Sponge, white baker’s twine. Elegant Dots Embossing Folder.

Card 2 of 6 - Thank You.


Cardstock: Tempting Turquoise, Melon Mambo

Ink: Melon Mambo

Tools: Decorative Dots Embossing Folder, sponge.

Dies: Seasonal Layers Thinlits.

Card 3 of 6 - Celebrate.


Stamps: Dots for Days, Waterfront.

Cardstock: Night of Navy.

Ink: Sahara Sand, Night of Navy.

Tools: Night of Navy marker, sponge.

Card 4 of 6 - Celebrate.


Stamps: Waterfront, Petite Petals.

Cardstock: Daffodil Delight, Tempting Turquoise.

Ink: Tempting Turquoise, Crumb Cake.

Tools: doily, sequins embossing folder, sponge.

Punches: Trio flower, Petite Petals.

Card 5 of 6 - Friend.


Stamps: Waterfront.

Cardstock: Garden Green.

Ink: Garden Green, Daffodil Delight.

Tools: Fancy Fan embossing folder, sponge.

Card 6 of 6 - Friend.


Stamps: Timeless Treasures.

Cardstock: Pool Party.

Ink: Pool Party, Crumb Cake.

Tools: Distressing tool, Real Red marker.

Dies: Layering Ovals framelits.

Canadians, if you’re interested in subscribing to Paper Pumpkin yourself, you can either sign up for a subscription where you are billed monthly for your kit or you can purchase a prepaid subscription in my online store.  To see more information and to sign up for the monthly subscription, click here.  Refills are currently available for this kit but you must be a current Paper Pumpkin subscriber to order any of the refills.

Paper Pumpkin is celebrating 5 years and what better way to start receiving creativity at your doorstep than with the March Anniversary kit. You'll receive a FREE GIFT and a specially designed, one-of-a-kind box! This kit is gorgeous, collectible, and is almost sure to go down in Paper Pumpkin history as an all-time customer favorite!
The free gift complements the kit but is not needed to complete the kit.
The free gift is exclusive to the March Paper Pumpkin kit and cannot be found anywhere else.
The free gift is a crafting product with a wide range of use that can be used on a variety of papercrafting projects.


Sunday, March 4, 2018

If It Ain’t Green Sign


Here’s one for the John Deere lovers – “If It Ain’t Green”!  Would make a unique gift!  Approximate size 7” wide x 9-1/2” high.  More info on my FB page.  Hope you will follow along for updates as I post them by "Liking" my Here’s Your Sign Facebook page. 

Friday, March 2, 2018

Blooming Basket - One Hour Card Class 048 - OHCC048


Stamps: Blooming Basket (SAB 2018).

Cardstock: Very Vanilla, Bermuda Bay, Black.

Ink: Memento Black, Daffodil Delight, Bermuda Bay.

Tools: Bermuda Bay blends, Daffodil Delight blends, Old Olive blends, baker’s twine, Basket Weave EF, Spritzer, dimensionals, glue dots, Tombow glue.

Dies: Celebrate You Thinlits (SAB 2018).

Made this card with the new sale-a-bration Blooming Basket stamp set and Basket Weave Dynamic embossing folder that are in the second release of Stampin’ Up! 2018 sale-a-bration.

I stamped my image on a 2-1/4” x 3-1/4” Very Vanilla cardstock.  Color the small images before coloring the flower. 


Before adhering the Bermuda Bay panel to the rose panel, die cut the word “YOU’ from the center. 


Don’t forget to spritz the Basket Weave embossing folder lightly with water before running it through the Big Shot.  This prevents the cardstock from tearing.  Wrap with baker’s twine about 3” from the bottom before adhering to the card front. Add Celebrate to the bottom of the card. 


Add mounts to the rose panel.  Make a tiny bow. 


Stamp and color the tiny butterfly.  Cut out and adhere to handle. 


Stamp three butterflies on a Very Vanilla panel for the inside of the card.  Add the word YOU. 


Decorate an envelope with stamped butterflies. 


Related Posts Plugin for WordPress, Blogger...