If you have never made a card before, you will love these
One Hour Card Class workshops! We will complete a card with a matching
envelope – ready for the mail! I host
card classes every Thursday, Friday and Saturday. You pick the day and the time that suits you.
Message or email me for more info. As a Stampin’ Up! demonstrator, I’m
here to give you fun ideas, share specials & teach you about fabulous
stampin products. Let's unleash your creativity! You can order SU! products online and have
them shipped directly to your door. Simply click on the “Shop Now” button in my
banner (or I can order for you). I would be most happy to be your Canadian
demonstrator.
A case from a video on You Tube by Frances Martin. I did do things a little different for the
snow.
Stamps:
Country Livin’, Thoughtful Branches, Birthday Banners or Christmas Pines.
Ink:
Soft Suede re-inker, Early Espresso re-inker, Early Espresso, Crumb Cake, Basic
Black.
Paper: thick white,
Soft Suede, Crumb Cake, vellum, 5” x 8” writing tablet paper for inside of card
or cut computer paper to this size.
Accessories: stipple
brush or small paint brush, toothpick, paint palette, Aqua Painter, distressing
tool or scissors, sponge, Bunch of Banners Framelits, post-it note, bone
folder, Snail Adhesive, Stampin’ Trimmer, Tombow glue, Fast Fuse adhesive, paper
towel, parchment paper, toothpick, old toothbrush, white acrylic paint, purchased
envelope in craft or white (or pre-make one), signature stamp or address
labels.
.
Stamp truck on a post-it
note and cut to create a mask.
When we were taught ‘masking’ some 20 years ago, we were
told to cut the entire edge off. This
way, there is no chance of a slight space showing between the two images. You will also notice that I didn’t cut the
bottom of my mask – that is because I don’t want the trunks of the trees coming
out the bottom of the truck.
Stamp truck on Crumb Cake panel 3-7/8″ x 5-1/8″ with Basic Black ink.
Cover with mask.
Stamp the set of three trees in Early Espresso ink, having the longest tree trunk even with the
grass. Leave a space and stamp the
single tree. Since it has already been
stamped off once, stamp it again somewhere in the background. Leave a space and stamp the set of three trees
again then repeat with the single tree.
I found it a lot less cluttery to only use the single tree as the faded
background – just be sure to stamp off once before applying to the
background. Don’t over do it.
Remove mask. In a circular motion, sponge from the grass on both sides and across the top of the panel
with Crumb Cake ink.
On a scrap of
Crumb Cake cardstock, practise using your small paintbrush or the Aqua Painter with ink to get the feel
of what too much or too less of water and ink will look like. Use the paper
towel to dab off the water/ink if needed.
Add half a drop of Early
Espresso re-inker to the paint
palette. Have your brush/aqua
painter wet. Pick up a touch of paint
then dab the paper towel to get rid some of the intense color. Paint the wooden box, small box and wheel wells. Clean
your brush on the paper towel.
Paint the remaining truck with Soft Suede re-ink, repeating as above. Don’t paint the
windows. Clean your brush. Don’t be like me and clean up everything to
find you forgot to paint the third tire!
Lay a scrap of 1-1/2”
x 5-1/2” vellum on the panel. Trace
under the truck following the truck image and landscape at the bottom of the
vellum. Set aside.
Lay a scrap of 3-1/2”
x 3” vellum on the panel. Trace a dome shape to
cover the truck. Cut following the
pencil lines.
Cover the truck with this dome shaped vellum mask.
Dip a wet toothbrush
into a glob of white acrylic paint
and flick over the panel – I held my panel fairly close to the toothbrush. Remove the mask.
Lightly flick again just to get a tiny bit on the
truck. Let dry a few minutes.
Distress the edges of the panel with your scissors or a distressing tool.
Curl each corner under then upwards with a bone
folder.
Use adhesive to tack your truck panel to scrap paper. Cover the wheels with the vellum mask and tape it to your work surface.
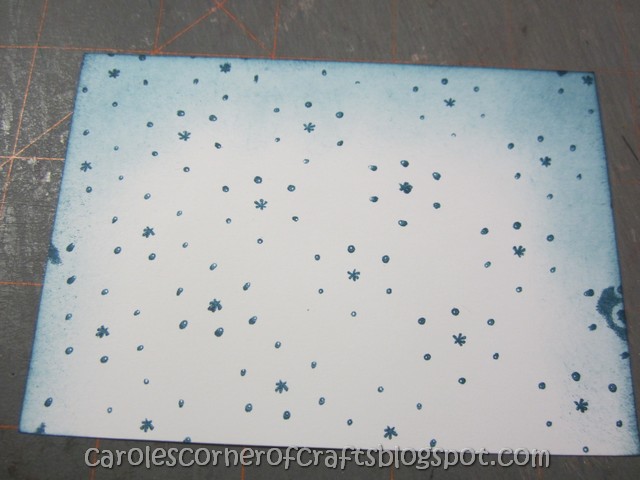
Squirt some acrylic paint into the palette. Dab to load your large stipple brush or a sponge
with ink. Pounce lightly to add snow. Clean your stipple brush/sponge.
Using a smaller stipple
brush or small paint brush, paint snow in the grass area. Remove mask. Clean your paintbrush etc.
Use a toothpick
to add snow wherever you think the snow would pile up on the truck. Let
dry – this may take a while.
Thick Whisper
White card. Sign the back.
Soft Suede panel
4″ x 5-1/4″. If you are doing this
card for a birthday, stamp Happy Birthday from the Birthday Banners stamp set in the center of the panel with Black
ink. If you are doing this card for a
Christmas card, stamp ‘Tis the Season’ from the Christmas Pines stamp set.
Die cut the banner using the Bunch of Banners Framelits. Sandwich
is: Magnetic platform – cutting pad - cardstock - die with cutting blade down –
cutting pad.
Distress edges of phrase.
Curl the ends upward with a bone folder.
Set aside.
Attach Soft Suede panel
to card front with snail adhesive.
Remember the writing
tablet? Perfect for the inside of
cards. Fold a piece in half. Sponge
edges in Crumb Cake ink. Stamp with a
phrase and an image if desired. Adhere
to inside of the card.
Sign or stamp the back of your card.
Once dry, adhere the truck panel to the card front but do
not put glue on the corners. Cover tires
with the mask again.
Add a couple drops of water to a bit of Aleen’s Glitter
Snow. Stir to make a paste.
Stipple it fairly thick under the truck. Let dry.
Add Birthday or Christmas phrase with Tombow glue or Fast Fuse adhesive to the card front.
Make an envelope from craft paper using the envelope punch
board. Stamp as desired.


If you have never made a card before, you will love these
One Hour Card Class workshops! We will complete a card with a matching
envelope – ready for the mail! I host
card classes every Thursday, Friday and Saturday. You pick the day and the time that suits you.
Message or email me for more info. As a Stampin’ Up! demonstrator, I’m
here to give you fun ideas, share specials & teach you about fabulous
stampin products. Let's unleash your creativity! You can order SU! products online and have
them shipped directly to your door. Simply click on the “Shop Now” button in my
banner (or I can order for you). I would be most happy to be your Canadian
demonstrator.
A case from a video on You Tube by Frances Martin. I did do things a little different for the
snow.
Stamps:
Country Livin’, Thoughtful Branches, Birthday Banners or Christmas Pines.
Ink:
Soft Suede re-inker, Early Espresso re-inker, Early Espresso, Crumb Cake, Basic
Black.
Paper: thick white,
Soft Suede, Crumb Cake, vellum, 5” x 8” writing tablet paper for inside of card
or cut computer paper to this size.
Accessories: stipple
brush or small paint brush, toothpick, paint palette, Aqua Painter, distressing
tool or scissors, sponge, Bunch of Banners Framelits, post-it note, bone
folder, Snail Adhesive, Stampin’ Trimmer, Tombow glue, Fast Fuse adhesive, paper
towel, parchment paper, toothpick, old toothbrush, white acrylic paint, purchased
envelope in craft or white (or pre-make one), signature stamp or address
labels.
.
Stamp truck on a post-it
note and cut to create a mask.
When we were taught ‘masking’ some 20 years ago, we were
told to cut the entire edge off. This
way, there is no chance of a slight space showing between the two images. You will also notice that I didn’t cut the
bottom of my mask – that is because I don’t want the trunks of the trees coming
out the bottom of the truck.
Stamp truck on Crumb Cake panel 3-7/8″ x 5-1/8″ with Basic Black ink.
Cover with mask.
Stamp the set of three trees in Early Espresso ink, having the longest tree trunk even with the
grass. Leave a space and stamp the
single tree. Since it has already been
stamped off once, stamp it again somewhere in the background. Leave a space and stamp the set of three trees
again then repeat with the single tree.
I found it a lot less cluttery to only use the single tree as the faded
background – just be sure to stamp off once before applying to the
background. Don’t over do it.
Remove mask. In a circular motion, sponge from the grass on both sides and across the top of the panel
with Crumb Cake ink.
On a scrap of
Crumb Cake cardstock, practise using your small paintbrush or the Aqua Painter with ink to get the feel
of what too much or too less of water and ink will look like. Use the paper
towel to dab off the water/ink if needed.
Add half a drop of Early
Espresso re-inker to the paint
palette. Have your brush/aqua
painter wet. Pick up a touch of paint
then dab the paper towel to get rid some of the intense color. Paint the wooden box, small box and wheel wells. Clean
your brush on the paper towel.
Paint the remaining truck with Soft Suede re-ink, repeating as above. Don’t paint the
windows. Clean your brush. Don’t be like me and clean up everything to
find you forgot to paint the third tire!
Lay a scrap of 1-1/2”
x 5-1/2” vellum on the panel. Trace
under the truck following the truck image and landscape at the bottom of the
vellum. Set aside.
Lay a scrap of 3-1/2”
x 3” vellum on the panel. Trace a dome shape to
cover the truck. Cut following the
pencil lines.
Cover the truck with this dome shaped vellum mask.
Dip a wet toothbrush
into a glob of white acrylic paint
and flick over the panel – I held my panel fairly close to the toothbrush. Remove the mask.
Lightly flick again just to get a tiny bit on the
truck. Let dry a few minutes.
Distress the edges of the panel with your scissors or a distressing tool.
Curl each corner under then upwards with a bone
folder.
Use adhesive to tack your truck panel to scrap paper. Cover the wheels with the vellum mask and tape it to your work surface.
Squirt some acrylic paint into the palette. Dab to load your large stipple brush or a sponge
with ink. Pounce lightly to add snow. Clean your stipple brush/sponge.
Using a smaller stipple
brush or small paint brush, paint snow in the grass area. Remove mask. Clean your paintbrush etc.
Use a toothpick
to add snow wherever you think the snow would pile up on the truck. Let
dry – this may take a while.
Thick Whisper
White card. Sign the back.
Soft Suede panel
4″ x 5-1/4″. If you are doing this
card for a birthday, stamp Happy Birthday from the Birthday Banners stamp set in the center of the panel with Black
ink. If you are doing this card for a
Christmas card, stamp ‘Tis the Season’ from the Christmas Pines stamp set.
Die cut the banner using the Bunch of Banners Framelits. Sandwich
is: Magnetic platform – cutting pad - cardstock - die with cutting blade down –
cutting pad.
Distress edges of phrase.
Curl the ends upward with a bone folder.
Set aside.
Attach Soft Suede panel
to card front with snail adhesive.
Remember the writing
tablet? Perfect for the inside of
cards. Fold a piece in half. Sponge
edges in Crumb Cake ink. Stamp with a
phrase and an image if desired. Adhere
to inside of the card.
Sign or stamp the back of your card.
Once dry, adhere the truck panel to the card front but do
not put glue on the corners. Cover tires
with the mask again.
Add a couple drops of water to a bit of Aleen’s Glitter
Snow. Stir to make a paste.
Stipple it fairly thick under the truck. Let dry.
Add Birthday or Christmas phrase with Tombow glue or Fast Fuse adhesive to the card front.
Make an envelope from craft paper using the envelope punch
board. Stamp as desired.