Friday, March 25, 2016

Using an Embossing Folder as a Stamp - One Hour Card Class 002 (OHCC002)


I combined a few ideas off Pinterest for this Easter card class however, you could change the phrase to any of the phrases from the Well Scripted stamp set and make it something different. 

Prepare a top fold card by cutting So Saffron cardstock at 4.25” x 11” to make a top fold card.  The card insert and front panel are cut at 5.25” x 4” from white cardstock

To use your embossing folder as a stamp, wipe your ink pad across the raised side of the Honeycomb embossing folder with Tangerine Tango ink.

Place the wrong side of your card on the un-inked side of the folder.

Close the flap.  Rub gently with your hand or use a brayer to transfer the ink.

Open the flap and there you have it! 

The Turquoise ribbon was placed about 2-3/4” from the bottom of the white panel. The 1/8” Turquoise ribbon was cut about 5” long, looped over the existing ribbon so the tails are to the left of the phrase then glued in place. 

Stamp two small flowers in Calypso Coral ink.  Punch out.  Curl petals to the right side. Adhere mounts. Stamp one large flower in Tangerine Tango ink.  Color with the Wink of Stella brush in clear.  Punch out, curl petals to the front, adhere a mount.  Stamp two small flowers, one large and small butterfly in Tempting Turquoise ink.  Punch out.  Curl petals and wings. Sponge a scrap of So Saffron cardstock with Tangerine Tango ink.  Punch flowers using the Trio Flower punch.  Curl petals to the right side. 


Adhere flowers and butterflies to the card in a pleasing manner.  Add a large rhinestone to the large flower and a tiny rhinestone to the phrase.  Add Dazzling Details to the remaining flowers and both butterflies.


The Envelope Template can be found on my first class (type OHCC001 in the Search box at the top left corner of my blog).  And there it is!  Ready to be signed and popped in the mail!


All supplies are from the ‘Share the Fun’ 2015 – 2016 big catalog unless otherwise stated.

Stamps: signature stamp (like Creatively Yours page 63), Kinda Eclectic page 127, Papillon Potpourri page 107, Well Scripted (retired).

Paper: Whisper White page 141, So Saffron page 139, Wild Wasabi page 139, Calypso Coral page 139, Tempting Turquoise page 139, 8-1/4“square paper for an envelope.

Ink: Daffodil Delight page 138, Tangerine Tango page 138, Wild Wasabi page 139, Calypso Coral page 139, Tempting Turquoise page 139.

Accessories: Stamping Sponges page 163, bone folder page 164, scissors page 168, Snail Adhesive page 156, Stampin’ Trimmer page 169, Stampin Dimensionals page 156, Honeycomb embossing folder page 174, ¼” Turquoise satin ribbon (non SU!), 1/8” Turquoise satin ribbon (non SU!), Dazzling Details page 162, Wink of Stella brush in clear – from the Occasions Catalogue (January to May, 2016), scotch tape, homemade envelope template.

Punch: Bitty Butterfly page 166, Elegant Butterfly page 166, Pansy page 167, Scallop Oval page 165, Trio Flower (retired).


Tuesday, March 22, 2016

SU268 Watercolor Resist


There has been a lot of watercolor backgrounds on Pinterest using this particular stamp set so I wanted to give it a try.  Decided I would follow Stamped Silly’s video for instructions since she said it was quick and easy and could be done under 10 minutes!  I didn’t find it quite as easy as she makes it look but it was fun!  The added bonus - the stamp set is FREE with a $60 purchase during Sale-A-Bration but it ends March 31st, 2016!

Stamps: Botanicals For You, Work of Art (for the inside and envelope).

Cardstock: Black, Gold, Marina Mist , Whisper White, Watercolor Paper,


Accessories: Black Stampin' Emboss Powder, Heat Tool, Aqua Painters, Embossing Buddy, Gold Metallic bakers twine, Wink of Stella, sponge, gold sequins, fun foam.

Punch: Trio flower, ¼” circle.

To do the Watercolor Resist, stamp your image with Versamark on watercolor paper.  Emboss the Just for You in black EP.  Add water to your watercolor paper covering only the area you want to add color - which is down the middle.  I happen to have re-inkers but you can also push on your stamp pad lid to add some color to the lid and pick up color that way.  Starting with your middle color, use your aqua painter to pick up some of the ink then touch down.  Gently color that area allowing your ink to spread.  If you want a more intense color, just add more ink.  Repeat with your next area you want to color and continue until you have added all the color you want.  Use a heat tool to dry it.  Your paper will warp when it is wet causing the colors to bleed into one another.  If you do not want your colors to bleed, tape the edges of your paper on to your work surface using low tack painter's tape before staring.

I didn’t have any Fast Fuse so I just used normal Snail on my fun foam.  It really does not hold that good to the foam.


I did some splattering too – can you see it?


I punched ¼” circles from black cardstock and colored them with Wink of Stella for the flower centers.  I also added a few scattered sequins.


I cheated for my envelope and the inside of my card – I used the smears from the Work of Art stamp set!


Friday, March 18, 2016

Workshop Cards W142, W143, W144

 Here are the cards I made at Joanne’s workshop last month.


Workshop Card W142 Happy Birthday Wishes


Paper: Tempting Turquoise, Black, White.

Stamps: Timeless Textures, Papillon Potpourri, Simply Sketched.

Ink: Tempting Turquoise, Black, Smokey Slate.

Punches: Elegant Butterfly, Bitty Butterfly.

I free hand cut the banners.  I sure do love this Timeless Textures stamp set!

Workshop Card W143 There’s Only One You


Paper: Rose Red, White, Blushing Bride.

Stamps: Painted Posies.

Ink: Rose Red, Versamark.

Accessories: Elegant Lines EF, Bloomin’ Hearts Thinlits die, sponge, Rhinestones, Fine Cosmo stampin’ glitter, Heat and Stick Powder.

Joanne started us out with a piece of rose red cardstock cut to the size of the heart die.  We pounced on it with the Versamark ink pad then applied Heat and Bond and heat set it.  While it was still hot, we covered it with the glitter and heat set again.  A very inexpensive way to make your own glitter paper

Workshop Card W144 With Sympathy


Paper: Vanilla, Soft Suede, Early Espresso.

Stamps: Beautiful Bunch, Bloom with Hope.

Ink: Soft Suede, Early Espresso.

Accessories: Secret Gardens Framelits, linen thread, Basic Pearls, Very Vintage EF, sponge, mounts.

Punches: Fun Flower, Modern Label.

Did you notice we only ran the embossing folder at the bottom of the vanilla panel?  Great idea for a different look!

Thank you for stopping by.  Both Joanne and I are SU! Demonstrators so if at any time you would like to purchase SU! products, give her a call or from my Blog, click on the Shop Now button.  Your order will be delivered right to you (you do have to give SU! a street address, not a box #).

Tuesday, March 15, 2016

Happy St Patrick’s Day - One Hour Card Class 003 (OHCC003)


Another good find on Pinterest!  I used a phrase from the Teeny Tiny stamp set.  One student switched hers to a birthday card as her grand daughter has a birthday this month.  So you can make it to whatever suits you.


Cut a panel 5” x 3-3/4” from Black.  Adhere a panel 3-5/8” x 4-7/8” of Certainly Celery DSP.  Cut a panel 3” x 4-1/4” from white cardstock.  Sponge edges in Certainly Celery.  Run through the embossing folder – put sponged edges towards the Sizzix logo.  Made a template to transfer hole markings and punched with the 1/8” circle punch.


Adhere to black panel and punch holes again – I used my Silent Setter as I couldn’t reach them all with the hand held punch.


Cut hemp 18” long – I like the thickness of the hemp compared to the linen thread for the stems.  Starting at the back, make one stem at a time.  Tape to the back.


Repeat for all stems.


Mount phrase in place. Wrap 22” of linen thread around the panel a couple of times and tie.


Apply full mounts across the top and bottom of the panel – I used pieces of matt board.  Apply full mounts down each side leaving the linen thread free to allow for a little wiggle room should you need it.  Add a couple of mounts in the center of the panel.


Now we will use the heart punch to make the shamrocks. Punch 16 hearts.  Curl the top edges and set aside.


Adhere the panel to the front of the card.  Add a puddle of glue to the top of the stem and to each side.  Add the hearts with the points touching the punched hole.


Press in place with the aid of the point of your scissors. 


Make a four leaf clover from one shamrock.  Add a rhinestone to the center of it and two small rhinestones to the phrase.  Punch four ¼” circles from Certainly Celery.  Adhere to each shamrock.  Top with glitter glue.  Tie your linen thread into a bow and trim tails if necessary.


We made an envelope from some packing paper.


All supplies are from the ‘Share the Fun’ 2015 – 2016 big catalogue unless otherwise stated.

Paper: Certainly Celery (retired), Whisper White page 141, Basic Black page 141, Certainly Celery DSP Stack (retired).

Stamps: Teeny Tiny Wishes page 95, Pinch Proof (retired - for the inside and envelope).

Ink: Basic Black page 141, Certainly Celery (retired).

Accessories: Signature stamp like Creatively Yours page 63 or address label, Snail Adhesive page 156, Stampin’ Sponge page 163, Stampin’ Dimensionals page 156, envelope template, Stampin’ Trimmer page 169, scissors page 168, bone folder page 164, Softly Falling Embossing Folder page 9 – Occasions 2016 catalogue, Rhinestones Basic Jewels page 160, Linen Thread page 159, silver sparkle Dazzling Details page 162, Multipurpose Liquid glue page 156, scotch tape, silent setter hole punch, hemp (retired).

Punches: Small Heart, Modern Label, 1/8” circle page 168, 1/4” circle page 168.


Friday, March 11, 2016

Milestone Birthday – 9 years old – B09d


Really liked smallbitsofpaper’s ladybug.  I changed it up a bit so I could call it my own.  I used the oval Coluzzle to make his body instead of a circle punch.  I also left his head as a whole punch – not sure it suits this little guy but it will do just fine.  I stamped the Elements of Style stamp onto a scrap of paper before stamping it on my cardstock as I just wanted a faint image.  Here is the poem I used for this 9 year old card from The Quote Garden.

We’re sending luck and wishes all wrapped up in a hug

Good things should come your way with this tiny ladybug.

Happy 9th birthday!

Cardstock: Old Olive, White, Real Red, Black, Summer Picnic DSP.

Ink: Old Olive, Black.

Stamp: Inspired by Nature, Memorable Moments, Elements of Style.

Accessories: sponge, oval Coluzzle, black marker, white gel pen.

Punches: ¾” circle, 1” circle, Bird Builder, Scallop Trim Border, Owl Builder, standard ¼” hole, 3/16” crop-a-dile, slot.

Font: Comic Sans size 22.

Friday, March 4, 2016

AG053 18” Doll Bow Sleeve T-shirt and Leggings Tutorial


I came across this tutorial for an 18” Doll Bow Sleeve T-shirt  by PixieFaire with the ties at the sleeves. Thought I would add a ruffle to the bottom as well.  I used the Scientificseamspattern.  I cut half an inch off the bottom of the front and back to allow for the ruffle.


Sew the shoulder seams, and hem the sleeves.  Add 4” strips of interfacing at Velcro placement.  Press. Cut neckband 1.25” wide by 10” or more depending on how stretchy the band is.  Press in half. 


Sew the neckband to the tee stretching slightly. 


Press towards the garment and topstitch.  Press again.

Find the middle of your 12” pieces of ribbon. Pin one to the outside edge of each shoulder.

Pin and sew the sleeves into the tee -- being sure you're sandwiching the ribbon between the sleeve and the body of the tee.  Clip curves, but be sure not to clip any of the ribbon!  Press towards sleeve.


Sew the side seams.  Press.

Cut ruffle 2” wide by 20” or so long.  Hem one long edge.  Chalk mark in quarters.  Press.


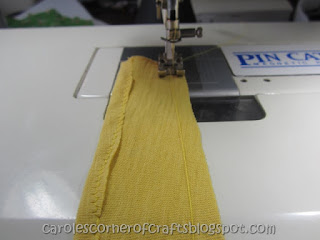
Gather the Nancy Z way (AG036).  With wrong side of fabric facing you, place the fabric under the presser foot on the stitching line about a seam width away from the edge. Turn the wheel by hand to make one stitch. Pull up on the top thread and bring the bobbin thread to the top of the fabric. 


Pull bobbin thread to a length equal to the area to be gathered. 

Place the thread under the presser foot. Adjust your machine for a medium zigzag stitch with a length of about 3.0.  Stitch over the bobbin thread just inside the seam allowance, making sure not to stitch over the bobbin thread. 


Stop a seam width away from the edge. 

Pull on the bobbin thread to gather the fabric. Since the thread was secured in the beginning, it will not come out.

Pin to bottom of tee matching chalked quarter marks.  Sew – I like to sew it twice.


Add a 3” of Velcro closure at the back.  Tie the ribbons into bows.  Trim the ends if needed and burn to prevent raveling. If your ribbon doesn't like staying tied, you can stitch through the bows once or twice to keep them in place.


Leggings

I did a bit of altering to Dollar Doll Clothes Pants/Pajama pattern and I am happy with how they fit. Because this fabric is so stretchy, I used a very slight zig zag on all the seams. 


Sew the center front seam using a 1/4-inch seam.  Clip curves.  Baste 9” of 1/2” elastic to waist. Press 3/8” for the leg hems.  


Serge to clean finish elastic at the waist.  Sew the hems and press.

Sew center back seam, adding a ‘back’ tag.  Clip curves.


Refold the pants bringing the center seams together and sew the inner legs.   Clip to stitching.  Press. 


Ordering info is on my 18” Doll Clothes Creations by Carole Facebook page.

Stay tuned for more 18” doll clothes tutorials or better yet, sign up to my Blog so you won’t miss any of my posts!

Related Posts Plugin for WordPress, Blogger...