Most of us rarely ever put
a photo into any other shape than a rectangle or square. And while it’s fun to fill your punches with
bright colors or Designer Series Papers, did you know that you can fill any punch
shape with a photo in MDS?
There is a Photos in Punches Challenge on Kimberly and Heather’s Facebook page this week. I submitted
this page. - I am waiting for Jackie to do the journaling.
Here is what you do:
1) Add the punch to your
page.
2) Use the "Paper
Fill" Option from the Design Center.
3) After you have selected
a paper (it doesn't matter which one) double click on the punch on the page and
zoom in on the paper to make sure it fills your punch.
4) From the Design Center click
on ‘Fill with Photo’! Your folder of photos comes. Choose your
photo.
5) You can then zoom in on
a particular area of the photo and/or move the photo within the punch window
until you have it as you like it, then click "Okay".
Before putting your photos
in the punch, get rid of any red eye – there is a button for that in MDS
too. I thought I could do it after, however,
even tho you have replaced the paper with a photo, the program only recognizes
it as a punch, not a photo. I didn’t
want to re-do the page, so these pictures have a bit of red eye!
I posted this page last
March, which works for putting a photo in a punch also. Now it has got a lot simpler - all you have
to do is click on the ‘Fill with Photo’ button!
 |
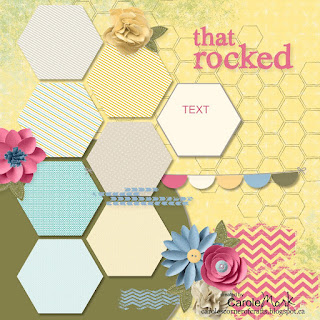
| Here is the page before adding photos |
Here is the Supply List:
Background
Designer Series Paper\_Designer Kits\This And That Epic Day – 9
Designer Series Paper\_Designer Kits\This And That Epic Day – 9
Embellishments
Designer Kits\My Sweet Pea - elements\My Sweet Pea - stitched leaf
Flowers\Bright Blooms\Bright Blooms - melon mambo 5, marina mist 6, melon mambo 3
Designer Kits\My Sweet Pea - elements\My Sweet Pea - stitched leaf
Flowers\Bright Blooms\Bright Blooms - melon mambo 5, marina mist 6, melon mambo 3
Flowers\Soft
Blooms - embellishments\Soft Blooms - 2 so saffron, 2 very vanilla
Round
Buttons\So Saffron - button
Buttons\Twitterpated - Baja Breeze large
Stamps
Designer Kits\Lemonade Stand - honeycomb
Designer Kits\Chevron - 8 grunge, 5 grunge, 1 grunge
Little Additions - string, Color = GOING GRAY
Designer Kits\Lemonade Stand - that rocked
Punches
Basics\1.25 Circle Punch
Basics\Hexagon Punch
Buttons\Twitterpated - Baja Breeze large
Stamps
Designer Kits\Lemonade Stand - honeycomb
Designer Kits\Chevron - 8 grunge, 5 grunge, 1 grunge
Little Additions - string, Color = GOING GRAY
Designer Kits\Lemonade Stand - that rocked
Punches
Basics\1.25 Circle Punch
Basics\Hexagon Punch
Basics\Half
Circle Punch


