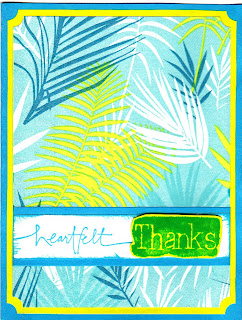
Decoupage Technique for Paper Napkins
Start with a pretty napkin.
Most decorative party napkins are two-ply. Separate the layers. You only need the pretty layer so discard the
other. If you don’t separate the napkin,
the Mod Podge will only adhere to the bottom layer (the one with no pretty on
it). Cut a scrap of cardstock ( I’ve
even used just plain computer paper) bigger than what your finished card will
be. We will trim it up after it
dries. Paint the scrap with Mod Podge
and quickly set the napkin on top of it.
Work fast as Mod Podge dries quickly.
Don’t worry if you have the odd wrinkle here and there – kinda gives it
texture. Let dry.
Once this has dried, you can now paint the top of the napkin
with Mod Podge then add a pinch of glitter while it is wet. It really doesn’t take much more than a pinch,
honest! If you intend to do this, paint
from the center of the napkin out toward the edges. Work slowly as not to tear the napkin. Let dry.
Use your napkin as a base for your card. Just cut it to fit on whatever size card you
are making.
Always clean your brush with water immediately after you
have finished painting.
Cardstock - Tempting Turquoise, non SU! neon yellow, White.
Ink - Tempting Turquoise.
Accessories - napkin, mod podge, paintbrush, ticket punch, mounts.
I made this card for my cousin Doreen. She had brought all kinds of goodies as well as a package of these napkins to our place after my mom passed away a couple years ago.


No comments:
Post a Comment