Grace is
going to help me make this cape following Old Days Old Ways instructions called
‘Doll Cape--from Santa Hat’ from her December 22, 2009 Blog.
Open the seam
of the purchased Santa Hat, remove the fur from the bottom and if it has a
pompom, remove it.
Follow Old Days
Old Ways instructions to make the darts.
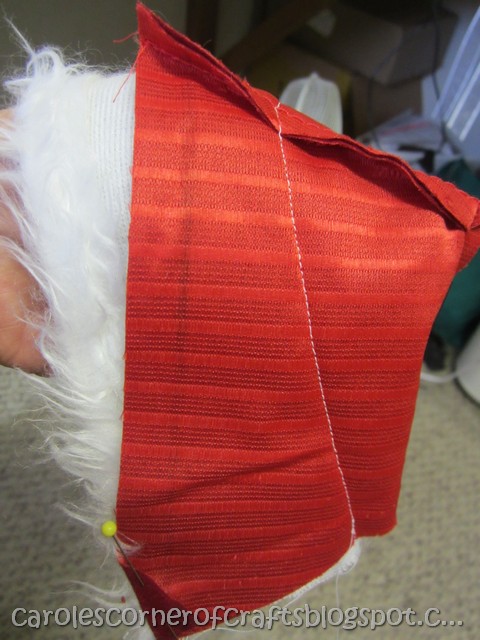
Once I pinned
the darts at the shoulders, I traced the fabric on to paper for a pattern as I wanted
to make more capes than one.
Lay the pattern
on to the hat as close to the bottom as possible.
To make the hat
from the left over piece, measure 4” at the top and 5” at the bottom. Cut and
set aside.
Turn center
front seams of the cape to wrong side using 3/8” seams. Create a tuck at one end of a 14” length of
7/8” wide ribbon. Pin the ribbon under
the 3/8” seam about ¼” from the top. Topstitch
down the center front seam. Repeat for
the other side.
Sew the fur to
the bottom of the cape. Clip and serge
to clean finish.
Sew the darts
at the shoulders and trim to about ¼”. Set
aside.
Sew center back
seam of the hood. Put it on the dolls
head.
As you can see,
the hood does not come to the front of the dolls head so, pin the fur so the
fur is at the front of the dolls head.
Sew at the back
of the fur only. It looks a little
strange from the inside.
Sew another
seam close to the first one then trim close to the seam.
Pin hood to
cape with right sides together, being careful not to catch the ribbon.
Sew, clip the
curves and serge to clean finish. Bring the
ribbon to the front and tack.
If you would
like one, click "Like" on my American Girl
Doll Creations by Carole Facebook page as the ordering info is there.
Stay tuned for
more American Girl doll tutorials or better yet, sign up to my Blog so you
won’t miss any of my AG posts!
Please leave a
comment below to let me know if you enjoyed this!

Grace is
going to help me make this cape following Old Days Old Ways instructions called
‘Doll Cape--from Santa Hat’ from her December 22, 2009 Blog.
Open the seam
of the purchased Santa Hat, remove the fur from the bottom and if it has a
pompom, remove it.
Follow Old Days
Old Ways instructions to make the darts.
Once I pinned
the darts at the shoulders, I traced the fabric on to paper for a pattern as I wanted
to make more capes than one.
Lay the pattern
on to the hat as close to the bottom as possible.
To make the hat
from the left over piece, measure 4” at the top and 5” at the bottom. Cut and
set aside.
Turn center
front seams of the cape to wrong side using 3/8” seams. Create a tuck at one end of a 14” length of
7/8” wide ribbon. Pin the ribbon under
the 3/8” seam about ¼” from the top. Topstitch
down the center front seam. Repeat for
the other side.
Sew the fur to
the bottom of the cape. Clip and serge
to clean finish.
Sew the darts
at the shoulders and trim to about ¼”. Set
aside.
Sew center back
seam of the hood. Put it on the dolls
head.
As you can see,
the hood does not come to the front of the dolls head so, pin the fur so the
fur is at the front of the dolls head.
Sew at the back
of the fur only. It looks a little
strange from the inside.
Sew another
seam close to the first one then trim close to the seam.
Pin hood to
cape with right sides together, being careful not to catch the ribbon.
Sew, clip the
curves and serge to clean finish. Bring the
ribbon to the front and tack.
If you would
like one, click "Like" on my American Girl
Doll Creations by Carole Facebook page as the ordering info is there.
Stay tuned for
more American Girl doll tutorials or better yet, sign up to my Blog so you
won’t miss any of my AG posts!
Please leave a
comment below to let me know if you enjoyed this!


No comments:
Post a Comment