I came across a Mermaid Tail
pattern on Crafty Moms Share blog. I
decided to change it up a bit – I wanted my doll to stand, therefore I moved
the tail pattern to the side of a skirt I created as shown in this diagram.
Turn waist down ½” and sew.
Insert 10” of elastic into
casing. Secure both ends.
Give elastic a tug then sew through
all thicknesses at the halfway point to prevent elastic from twisting.
Sew from notch, around the tail and
up to the waist.
Put a wee bit of stuffing into the
tail.
Sew a line to keep the stuffing in
place.
Mermaid Top for AG doll
I also liked the little tube top
that Crafty Moms Share blog used. She
didn’t have any measurements so I just winged it.
If using stretchy fabric, cut it 4.5”
by 14” long. If using a firm fabric, cut
it 4” by 14”. I know the dolls chest
only measures 11” but I like to allow lots extra and cut it off later.
When serging
stretchy fabric into a tube, serge over a narrow piece of
ribbon to prevent stretching. My pink fabric was very firm so there was no need to do that to
it.
Loop 16” of ribbon or trim in half
and place under the tube.
Bring the ends of the ribbon over
the top of the tube and through the loop.
Pull tight and pin. Try on the doll. Make any adjustments.
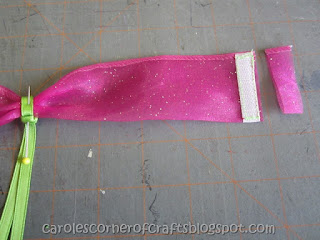
Add Velcro and trim off excess.
Stitch through the ribbon loop to
hold in place.
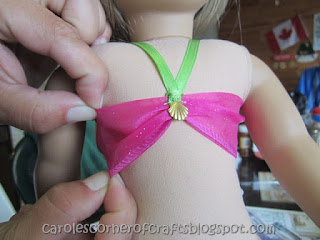
Put it back on the doll and pin the
ribbon straps to fit. Stitch.
Add a sew-on charm to center front. Once it is on the doll, give the
top and bottom a tug to fit.
If you would like one, click "Like" on my American Girl Doll Creations by
Carole Facebook page as the ordering info is there.
Stay tuned for more American Girl
doll tutorials or better yet, sign up to my Blog so you won’t miss any of my AG
posts!
Please leave a comment below to let
me know if you enjoyed this!


No comments:
Post a Comment