If you have never made a
card before, you will love these One Hour Card Class workshops! We will
complete a card with a matching envelope – ready for the mail! I host card classes every Thursday, Friday
and Saturday. You pick the day and the
time that suits you. Message or email me for more info. As a
Stampin’ Up! demonstrator, I’m here to give you fun ideas, share specials &
teach you about fabulous stampin products. Let's unleash your creativity! You can order
SU! products online and have them shipped directly to your door. Simply click
on the “Shop Now” button in my banner (or I can order for you). I would be most
happy to be your Canadian demonstrator.
Stamps: Festival
of Trees, Hardwood, Gorgeous Grunge, Greetings of the Season (retired) for the
inside.
Cardstock: Whisper White, Blackberry Bliss, Smoky Slate, Island
Indigo, Pool Party, Corrugated, Dazzling Diamonds Glimmer paper, writing paper.
Ink: Soft
Suede, Blackberry Bliss, Pool Party, Island Indigo.
Accessories: Stamping Sponges, bone folder, scissors, pencil, Snail
Adhesive, Tombow glue or Mini Glue Dots or Snail, Softly Falling embossing
folder, Coluzzle circle template, Stampin’ Trimmer, 15” Silver Metallic Bakers
Twine, 15” Coastal Cabana thick bakers twine.
Punch: Star
from Itty Bitty Accents pack, Tree, Scalloped Tag Topper.
Blackberry Bliss card. It is hard to
sign or stamp the back of a dark card – my solution is to stamp your signature
stamp on to a label or use an address label.
Set aside.
Cut a panel 5-1/4” x 4” from Smoky Slate cardstock. Stamp with the Hardwood stamp set using Soft
Suede ink. Sponge edges with Soft Suede ink.
Set aside.
Fold the writing paper in half for the inside of the card. Lay the paper on top of the Hardwood stamp set without re-inking,
cover with a scrap piece of paper and press gently to transfer the ink.
Stamp a phrase from the Greetings of the Season with Island Indigo ink. Use Snail
Adhesive to adhere to the inside of the card. Set aside.
Stamp a tree from the Festival of Trees stamp set on to Pool Party cardstock with Pool Party ink and another tree on to
Island Indigo cardstock with Blackberry Bliss ink. Heat to dry slightly. Rub with the Embossing Buddy. Punch out with the Tree punch. Pounce very
lightly to add a touch of 2-way glue here and there on each tree.
Cover with Dazzling Diamonds
glitter. Set aside to dry.
To extend the length of
any of the Banners Framelits, simply cut the cardstock slightly narrower
than the width of the INSIDE of the die by as
long as you want it. Lay the end to be
cut under the die and the other end on top!
Just die cut that one end!
Cut Island Indigo cardstock 2-3/4” wide by 5-1/2” long. Cut Pool
Party cardstock a hair wider than 1-3/8” wide by 5-1/2” long. Extend the length as stated above.
Sponge edges with Soft
Suede ink.
Adhere Island Indigo tag to
the center of smoky slate panel. Set
aside.
Run Pool Party tag through
the Softly Falling embossing folder
with the ink facing the Sizzix logo.
Adhere to the center of the Island Indigo tag.
Trim top if necessary and
re-sponge. Adhere panel to card front. Set aside.
Cut the Corrugated paper 2” wide by 4” long. Punch with the tag topper punch. Cut 8” of Coastal Cabana thick twine and 8” Silver Metallic Bakers Twine. Join them together. Tie into a bunny ear bow – make two loops
and tie together. I found this picture
on Pinterest but the website is no longer available.
There is also a good picture
tutorial here but honestly, it is as simple as making two bunny ears and tying
them together. Use a glue dot to adhere
to the tag.
Adhere tag to card front. Set aside.
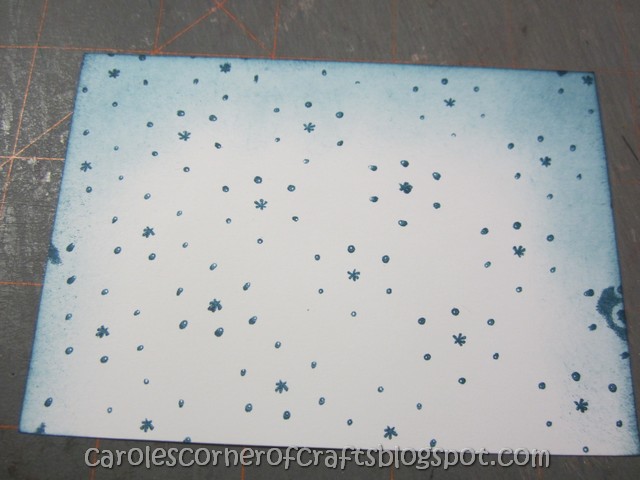
Cut a 2-3/4” circle using the
Coluzzle circle template. Since doing this card, I have invested in the
Layering Circles Framelits dies. One of
the circles in there is pretty darn close to 2-3/4”. Sponge edges with Soft Suede ink. Over stamp with the dots from the Gorgeous
Grunge stamp set with Blackberry Bliss ink.
Adhere to the center of the card.
Set aside.
Cut Smoky Slate cardstock at 3-3/4” long by 5/8” wide. Cut each end into a flag using the Banner Punch. Sponge edges with Soft Suede ink. Adhere to the center of the circle. Set aside.
Brush excess glitter of the
trees with a paint brush. Adhere trees
to the circle in a pleasing manner.
Punch 3 stars from glimmer cardstock 2-1/2” x ¾”. Adhere to card front.
Using
Tissue Paper and Freezer Paper to make an Envelope
Turn iron on a medium-high setting.
Cut the freezer paper 8” square.
Cut the piece of tissue paper at least 10”.
Crumple the tissue paper,
open and crumple again to add texture.
Carefully smooth out the tissue paper but don’t remove all the wrinkles.
Lay papers on your ironing board
with the freezer paper on the bottom (wax side up) and the tissue paper on top
(pretty side up) and gently iron.
When ironing, don’t smooth out the wrinkles as that would defeat the whole
purpose of crumpling it. Instead, press it. To do this you put your
iron in one place for a few seconds, lift it up, don’t slide it, and put it
down again somewhere else. Overlap your “pressings”.
Turn paper over and press
again.
Cut excess tissue paper off flush with the freezer paper.
Complete with the Envelope punch board.

If you have never made a
card before, you will love these One Hour Card Class workshops! We will
complete a card with a matching envelope – ready for the mail! I host card classes every Thursday, Friday
and Saturday. You pick the day and the
time that suits you. Message or email me for more info. As a
Stampin’ Up! demonstrator, I’m here to give you fun ideas, share specials &
teach you about fabulous stampin products. Let's unleash your creativity! You can order
SU! products online and have them shipped directly to your door. Simply click
on the “Shop Now” button in my banner (or I can order for you). I would be most
happy to be your Canadian demonstrator.
Stamps: Festival
of Trees, Hardwood, Gorgeous Grunge, Greetings of the Season (retired) for the
inside.
Cardstock: Whisper White, Blackberry Bliss, Smoky Slate, Island
Indigo, Pool Party, Corrugated, Dazzling Diamonds Glimmer paper, writing paper.
Ink: Soft
Suede, Blackberry Bliss, Pool Party, Island Indigo.
Accessories: Stamping Sponges, bone folder, scissors, pencil, Snail
Adhesive, Tombow glue or Mini Glue Dots or Snail, Softly Falling embossing
folder, Coluzzle circle template, Stampin’ Trimmer, 15” Silver Metallic Bakers
Twine, 15” Coastal Cabana thick bakers twine.
Punch: Star
from Itty Bitty Accents pack, Tree, Scalloped Tag Topper.
Blackberry Bliss card. It is hard to
sign or stamp the back of a dark card – my solution is to stamp your signature
stamp on to a label or use an address label.
Set aside.
Cut a panel 5-1/4” x 4” from Smoky Slate cardstock. Stamp with the Hardwood stamp set using Soft
Suede ink. Sponge edges with Soft Suede ink.
Set aside.
Fold the writing paper in half for the inside of the card. Lay the paper on top of the Hardwood stamp set without re-inking,
cover with a scrap piece of paper and press gently to transfer the ink.
Stamp a phrase from the Greetings of the Season with Island Indigo ink. Use Snail
Adhesive to adhere to the inside of the card. Set aside.
Stamp a tree from the Festival of Trees stamp set on to Pool Party cardstock with Pool Party ink and another tree on to
Island Indigo cardstock with Blackberry Bliss ink. Heat to dry slightly. Rub with the Embossing Buddy. Punch out with the Tree punch. Pounce very
lightly to add a touch of 2-way glue here and there on each tree.
Cover with Dazzling Diamonds
glitter. Set aside to dry.
To extend the length of
any of the Banners Framelits, simply cut the cardstock slightly narrower
than the width of the INSIDE of the die by as
long as you want it. Lay the end to be
cut under the die and the other end on top!
Just die cut that one end!
Cut Island Indigo cardstock 2-3/4” wide by 5-1/2” long. Cut Pool
Party cardstock a hair wider than 1-3/8” wide by 5-1/2” long. Extend the length as stated above.
Sponge edges with Soft
Suede ink.
Adhere Island Indigo tag to
the center of smoky slate panel. Set
aside.
Run Pool Party tag through
the Softly Falling embossing folder
with the ink facing the Sizzix logo.
Adhere to the center of the Island Indigo tag.
Trim top if necessary and
re-sponge. Adhere panel to card front. Set aside.
Cut the Corrugated paper 2” wide by 4” long. Punch with the tag topper punch. Cut 8” of Coastal Cabana thick twine and 8” Silver Metallic Bakers Twine. Join them together. Tie into a bunny ear bow – make two loops
and tie together. I found this picture
on Pinterest but the website is no longer available.
There is also a good picture
tutorial here but honestly, it is as simple as making two bunny ears and tying
them together. Use a glue dot to adhere
to the tag.
Adhere tag to card front. Set aside.
Cut a 2-3/4” circle using the
Coluzzle circle template. Since doing this card, I have invested in the
Layering Circles Framelits dies. One of
the circles in there is pretty darn close to 2-3/4”. Sponge edges with Soft Suede ink. Over stamp with the dots from the Gorgeous
Grunge stamp set with Blackberry Bliss ink.
Adhere to the center of the card.
Set aside.
Cut Smoky Slate cardstock at 3-3/4” long by 5/8” wide. Cut each end into a flag using the Banner Punch. Sponge edges with Soft Suede ink. Adhere to the center of the circle. Set aside.
Brush excess glitter of the
trees with a paint brush. Adhere trees
to the circle in a pleasing manner.
Punch 3 stars from glimmer cardstock 2-1/2” x ¾”. Adhere to card front.
Using
Tissue Paper and Freezer Paper to make an Envelope
Turn iron on a medium-high setting.
Cut the freezer paper 8” square.
Cut the piece of tissue paper at least 10”.
Crumple the tissue paper,
open and crumple again to add texture.
Carefully smooth out the tissue paper but don’t remove all the wrinkles.
Lay papers on your ironing board
with the freezer paper on the bottom (wax side up) and the tissue paper on top
(pretty side up) and gently iron.
When ironing, don’t smooth out the wrinkles as that would defeat the whole
purpose of crumpling it. Instead, press it. To do this you put your
iron in one place for a few seconds, lift it up, don’t slide it, and put it
down again somewhere else. Overlap your “pressings”.
Turn paper over and press
again.
Cut excess tissue paper off flush with the freezer paper.
Complete with the Envelope punch board.