Friday, August 26, 2011

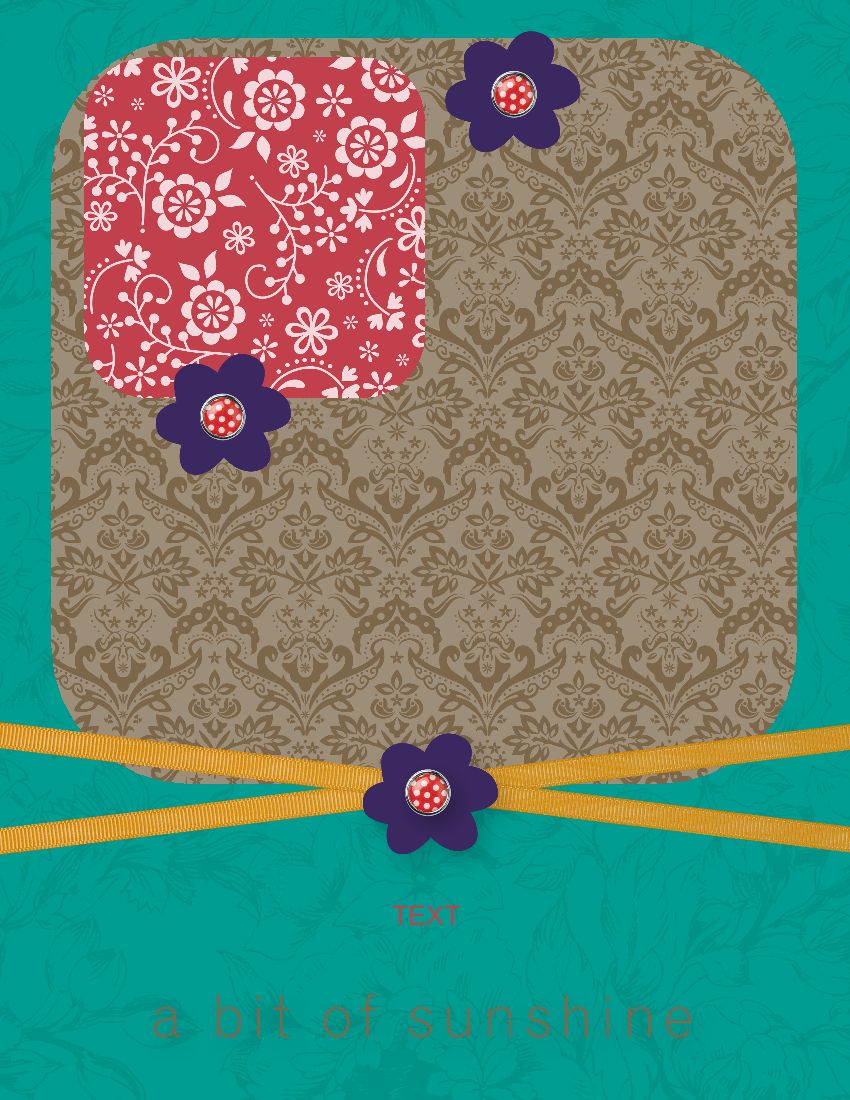
MDS 026 A Bit of Sunshine Scrapbook Page

Today, we are rounding the corners of our pictures by putting a picture in the rounded corner punch first.  This works with any of the punches but I will keep it simple.
If you have just stumbled on my Blog, type ‘MDS Scrap Page’ in the Search Box (top left corner) to see what we have been doing.  I am using Windows 7 so you may need to click on HELP (across the top of the program), My Digital Studio Help if you are using a different Windows than me.   Watch for NEW Scrap Pages posted every Friday.

Background paper - Designer Series Paper – Designer Kits – My Sweet Pea – 17.
Punch – rounded corner punch – grab a corner & resize to fit the top of your page – paper fill – Brocade Soft Suede.
Embellishment – grosgrain ribbon – More Mustard – rotate about 7 – repeat for another one at minus 7 rotation.
Punch – rounded corner punch – grab a corner and resize to what you want your photo to be - paper fill – Blooms Riding Hood Red (this can be any DSP but if you are following along, it is easier to understand if I pick the paper for you) – copy and paste to make a total of four to fit our Soft Suede Background.  To add your pictures, double click on one punch – Punch Image Editor opens – click on Replace Image – choose your picture – repeat for the other three punches.  Mat in Real Red.

Stamps – Chat Room Baby – Sunshine - change color – Soft Suede.
Stamps – Good Friend - flower - change color – Concord Crush – Drop Shadow.
Embellishment – Sending Love Epoxy Brads – place on top of flower – Align – middle – Drop Shadow.   Click on brad, hold shift key & click on the flower – Arrange – Group.  Now you can move it around without it coming apart.  Copy & paste to make two more.

Friday, August 19, 2011

MDS 025 New Baby Scrapbook Page

If you have just stumbled on my Blog, type ‘MDS Scrap Page’ in the Search Box (top left corner) to see what we have been doing.  I am using Windows 7 so you may need to click on HELP (across the top of the program), My Digital Studio Help if you are using a different Windows than me.   Watch for NEW Scrap Pages posted every Friday. 
 
I really liked this card so thought I’d try and copy it for a scrap page.  This lady has a great Tutorial on her Blog so I’ll just get you to follow what she did rather than type it all out.  With a little practice, I’m sure I could get as good as hers!  Here is a list of what I used on my page:

Cardstock – So Saffron, Tempting Turquoise, Very Vanilla.

Stamps – Torn Edges (hand torn) - shadowed with Night of Navy, Fundamental Phrases, Nursery Necessities, Holiday Blitz.

Embellishment – brads – Night of Navy.
Punch – square.

Friday, August 12, 2011

MDS 024 It’s All in the Detail Scrapbook Page

If you have just stumbled on my Blog, type ‘MDS Scrap Page’ in the Search Box (top left corner) to see what we have been doing.  I am using Windows 7 so you may need to click on HELP (across the top of the program), My Digital Studio Help if you are using a different Windows than me.   Watch for NEW Scrap Pages posted every Friday. 
 
Background paper – cardstock – Textured Cardstock – Kiwi Kiss.

Punch – Scallop Trim Border – color fill – White.

To make this wider:

Punch – square – stretch into a rectangle to fit the border punch - color fill – White.  Drag another Scallop Trim Border.  Place on top of the white – chane color – Pumpkin Pie.  Repeat with the square punch to make this wider.  Add another scallop in Tempting Turquoise & Real Red.  Repeat with the square punch to make each one wider. 
This is an 8.5x11 portrait page.
Embellishment – Designer Kits – Hoppy Memories – borders – 1 – rotate.

Punch – square – color fill – White - enlarge to make a mat for your pictures.

Embellishment – Designer Kits – Hoppy Memories – labels – 1 – rotate.  Also add label 7.

Embellishment – Designer Kits – Hoppy Memories – tags – 1.

Embellishment – Designer Kits – Hoppy Memories – elements – details.  Also add heart.

Embellishment – grosgrain ribbon – chocolate chip.

Embellishment – grosgrain ribbon – bow - chocolate chip.

Wednesday, August 10, 2011

SU219 Dryer Sheet and Brad BowTechnique

I have never done this technique before & it has been out for years!  Messy but relatively very simple to do.  Since Sylvia's 2011 Christmas Card Challenge involves glitter for August, I thought it would be a perfect time to try it.  I know the glitter doesn't scan but it really is there.  I thought I would use the Brad Bow on this card too just to keep it simple.  I followed Trina's instructions for that.  It is a little difficult to be thinking of Christmas cards at this time of the year but I know I sure will be happy to have them done by December!

Stamp Set: Serene Snowflakes.
Cardstock: Rich Razzleberry, Pacific Point, White.
Ink: Rich Razzleberry, Pacific Point.
Accessories: Silver paper fastener, approximately 6" ribbon, used dryer sheet, 1/8" hole punch, spray adhesive, Dazzling Diamonds.

Dryer Sheet Technique
Cut your dryer sheet (has to be a used sheet) bigger than your cardstock then set aside.  Stamp the snowflakes on to the white cardstock.  Lay newspapers onto your work surface.  Spray the stamped image well with spray adhesive. The surface needs to be completely coated with adhesive.  Using your tweezers, pick up the stamped image (this keeps adhesive off your fingers) and place on fresh newspaper.  Quickly place the used dryer sheet on the fresh adhesive. Don't press down yet.  Sprinkle glitter over the surface of the dryer sheet.  Use your finger to gently rub the glitter over the surface of the dryer sheet until it has stuck to the stamped design.  Shake to remove excess glitter.  Wrap the excess bounce sheet to the back and tape down. 

Total Christmas Cards for 2011:
January = 1, February = 6, March = 5, April = 5, May= 6, June = 4, July = 5, August = 4.
A total of 36 cards thus far!  Thanks Sylvia for keeping me going!

Friday, August 5, 2011

MDS 023 Good Times

If you have just stumbled on my Blog, type ‘MDS Scrap Page’ in the Search Box (top left corner) to see what we have been doing.  I am using Windows 7 so you may need to click on HELP (across the top of the program), My Digital Studio Help if you are using a different Windows than me.   Watch for NEW Scrap Pages posted every Friday. 
 
Background paper – Designer Kits – Textured Cardstock – So Saffron.

Background paper – Designer Kits – My Sweet Pea – 15 - Add as Page Layer – resize 7x9” – rotate -5.

Background paper – Designer Kits – My Sweet Pea – 33 - Add as Page Layer – resize 6.5x1.5” – rotate – mat – Chocolate Chip.

Background paper – Designer Kits – My Sweet Pea – 25 - Add as Page Layer – resize 6.5x1” – mat – Chocolate Chip - rotate.

Background paper – Designer Kits – My Sweet Pea – 27 - Add as Page Layer – resize 6.5x3” – rotate – mat – Chocolate Chip.

Punch – Eyelet Border – color match to the teal – rotate.  Copy & paste to make another one to join – Arrange – Send to back - Drop Shadow – Opacity 65 Blur medium.

Stamps – Greatest Moments 11 – Good Times - change color – Chocolate Chip.

Stamps – Garden Whimsy – large butterfly – rotate - change color – Pumpkin Pie

Stamps – Garden Whimsy – small butterfly – change color – Pumpkin Pie.  Copy, paste & Mirror to make a second small butterfly.

Stamps – Fundamental Phrases – xoxo – resize - match color – teal.

Friday, July 29, 2011

MDS 022 Congratulations Graduate


I was sure Brilliant Blue would match these graduating triplets but when I dropped the pictures in place, Brilliant Blue was not the color!  So I changed the colors to Bashful Blue & Pacific Point, however, I already had these instructions printed on my Blog & I wasn't about to change them!
If you have just stumbled on my Blog, type ‘MDS Scrap Page’ in the Search Box (top left corner) to see what we have been doing.  I am using Windows 7 so you may need to click on HELP (across the top of the program), My Digital Studio Help if you are using a different Windows than me.   Watch for NEW Scrap Pages posted every Friday.

Background paper – color – Brilliant Blue.
Punch – square – enlarge to cover the whole page - paper fill – Designer Kits – Night and Day – 7 – change Opacity (bottom right) to 14.  Makes a neat background eh?  Found this idea on the MDS site.
Background paper – cardstock – whisper white.
Punch – eyelet border - color fill – whisper white.
Page before adding Photo boxes
Stamps – Go Graduate Plus – feet (copy & paste to make another set of feet to fit across the page) - change color – Cherry Cobbler.
Background paper – cardstock – crushed curry - Add as Page Layer.

Embellishment – grosgrain ribbon – crushed curry.

Punch – square - color fill – whisper white – resize to make a rectangle for title.
Stamps – Go Graduate Plus – congratulations - change color – Cherry Cobbler.
Punch – square - color fill – crushed curry.  Copy & paste to make another square.  Rotate & put one on each end of the white rectangle.

Punch – scallop circle - color fill – Cherry Cobbler.

Punch – circle – color fill – whisper white – match color – click on the blue background.

Insert Duplicate Page Mirrored to easily make a double page spread or just bump it forward for another layout.   Again, watch for a NEW Scrap Page posted next Friday.

My Digital Studio Catalog PDF catalog will be updated every month and is available to you on MyDigitalStudio.net  under Resources.   If you have not ordered your copy of My Digital Studio yet or if you would like to order anything from the catalogue, just click on the On Line Ordering button in my left sidebar and your order will be mailed directly to you!   Downloads will go to your computer automatically.

Friday, July 22, 2011

MDS 021 Celebrate You Scrapbook Page

Here is a very delicate page.
If you have just stumbled on my Blog, type ‘MDS Scrap Page’ in the Search Box (top left corner of my Blog) to see what we have been doing.  I am using Windows 7 so you may need to click on HELP (across the top of the program), My Digital Studio Help if you are using a different Windows than me.   Watch for NEW Scrap Pages posted every Friday.
Background paper – color – Wild Wasabi.
Background paper - Designer Series Paper – Designer Kits – Springtime Vintage – 7 - Add as Page Layer.  Double click & resize to about 7.5x11.5 inches.  Place to the right, up to the bleed area.
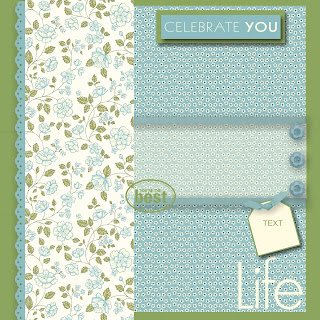
Page before adding Photo boxes
Punch – square – resize to make a rectangle about 3” long by the width of the DP - color fill – very vanilla – Opacity (bottom right) to 40.  It now looks like a piece of vellum.
Embellishment – grosgrain ribbon – Baja Breeze times two – Drop Shadow – Opacity 65, Blur medium.

Punch – square – resize into a rectangle to cover ribbon ends – color fill - Wild Wasabi.  Repeat for another one.

Background paper - Designer Series Paper – Designer Kits – Springtime Vintage – 4 - Add as Page Layer.  Double click & resize to about 4”x12”.
Stamps – Torn Edges – eyelet border – rotate - change color – Baja Breeze.
To have just a little edge of the eyelet border showing, click on the Springtime Vintage 4 pattern – Arrange – Order – Bring to Front.

Embellishment – button bouquet – Baja Breeze 2, times 3– Drop Shadow – Opacity 65, Blur medium.  Click on one button.  Hold your shift key down & click on the other two – Align (in the Toolbar across the top) – right.

Stamps – Greatest Moments 11 – Life - change color – Very Vanilla.

Stamps – Greatest Moments 11 – You’re the Best - change color – Wild Wasabi.

Punch – square – resize to a rectangle - color fill – Wild Wasabi – Drop Shadow – Opacity 65, Blur medium.

Punch – square – resize to fit on top of Wild Wasabi rectangle - color fill – Baja Breeze – Drop Shadow – Opacity 65, Blur medium.

Stamps – A Little Birthday Cheer – Celebrate You - change color – Very Vanilla – resize a bit bigger.  Set on top of the Baja Breeze rectangle.  Resize the rectangles to fit the stamp.  Once you are happy with the layer, click on each rectangle & the stamp – Arrange – Group.  Now you can move it around without it coming apart.

Punch – Tag – rotate to minus 15 - color fill – Very Vanilla – mat – Wild Wasabi - Drop Shadow – Opacity 65, Blur medium.

Embellishment – grosgrain knot – Baja Breeze – rotate – Drop Shadow – Opacity 65, Blur medium.

Related Posts Plugin for WordPress, Blogger...