Pages

Friday, September 30, 2011

MDS 031 Make a Wish Scrapbook Page

Page before adding Photo boxes.
My Digital Studio Software by Stampin' Up!

This page by inspired from the April 18, 2010 sketch from My Little Sketch Blook.

Paper: Old Olive, Autumn Spice DSP.

Stamp Brush Sets: All Scallops, Simple Friendship, A Little Birthday Cheer.

Embellishments: Summer Home Labels, Staple & Stitching, Buttons Pack Neutral, Round Button.

This is a 12x12 page.
Punches: Circle for text box.


MLSB April 18, 2010.
If you have just stumbled on my Blog, type ‘MDS Scrap Page’ in the Search Box (top left corner) to see what we have been doing.  I am using Windows 7 so you may need to click on HELP (across the top of the program), My Digital Studio Help if you are using a different Windows than me.   Watch for NEW Scrap Pages posted every Friday.  

Friday, September 23, 2011

MDS 030 Friends Scrapbook Page

Ohhhhh... I was really hoping this day would never come!  All My Children goes off the air after over 40 years!   Not that I've watched it for that long but I have gotten very involved!  On the other hand, it is a happy day because it is our 44th wedding anniversary!  Life just goes on I guess - Soaps or no Soaps!

If you have just stumbled on my Blog, type ‘MDS Scrap Page’ in the Search Box (top left corner) to see what we have been doing.  I am using Windows 7 so you may need to click on HELP (across the top of the program), My Digital Studio Help if you are using a different Windows than me.   Watch for NEW Scrap Pages posted every Friday.

Background paper - Designer Series Paper – Designer Kits – 2010 New Colors Patterns - Marina Mist Polka Dots.

Stamps – All Scallops – 4 – flip – grab a corner & stretch to fit the whole page - change color – Wild Wasabi.  Place about 1/2 inch from the bottom of your page.  Drop Shadow – Opacity 45 Blur 9.
Background paper - Designer Series Paper – Designer Kits – 2010 New Colors Patterns – Early Expresso stripes - Add as Page Layer – Double click & resize to about 1.5x12 inches.  Place at the very bottom of your page.  Drop Shadow – Opacity 65 Blur medium.
Page before adding Photo boxes.
Embellishment – Staples & Stitching – whisper white zigzag.
Embellishment - Designer Kits – Christmas Jingle elements – 2nd last image.  Stretch the stitched frame to fit inside the bleed area.
Stamps – Friends 24/7 – verse - change color – – Early Expresso.
Stamps – Enjoy Every Moment – 3rd image from bottom – enlarge - change color – whisper white.  Copy & paste to make another one.  Set the Friend verse inside the bottom circle.
Background paper - Designer Series Paper – Designer Kits – 2010 New Colors Patterns – Early Expresso Polka Dots - Add as Page Layer – Double click & resize to about4.5x7.5 inches. 

Punch – scallop edge – flip - color fill – Wild Wasabi.  Copy & paste to make another one.

Embellishment – Staple & Stitching – chocolate chip zigzag x 2.

Punch – square – resize about 9x4 inches - color fill – So Saffron.  Change Opacity (bottom right) to 70 to look like vellum.

Embellishment – Basic Pearls & Rhinestones – 4th image.  Copy & paste to make three.  Place where you want them.  Click on one rhinestone.  Hold your shift key down & click on the other ones – Align (in the Toolbar across the top) – choose left or right.

Stamps – One of a Kind – three flowers - change color – So Saffron - Drop Shadow – Opacity 45 Blur 9.  Copy & paste to make a total of 3.  Rotate, flip or mirror to your liking.

Wednesday, September 21, 2011

MDS-D 001 Santa Comes Digital Card

I have really got into digital scrapbooking using My Digital Studio (MDS) by SU! and have hardly done any stamping since January!  Yikes!  I really want to try and keep up with Sylvia’schallenges since I’ve come this far!  This is the September card I did.  We could use non Traditional Colors.  I chose Pink, Lime Green and Kraft and created it in MDS.  I was snooping around on Nancy’s Blog, spotted THIS CARD and decided to kinda do a copy of it.

 Stamps:  Old Saint Nick – phrase (Lucky Limeade); A Jolly Holly Christmas – tree (Lucky Limeade).

Punch:  Decorative Label (Pretty in Pink, matted Kraft).

Cardstock:  Textured Kraft (card); Patterns – background (Lucky Limeade); Stripe (Kraft).

Embellishments:  Brads (Pretty in Pink).

Total Christmas Cards for 2011:
January = 1, February = 6, March = 5, April = 5, May= 6. June = 4, July = 5, August = 4 , September = 4.

A total of 40 Christmas cards done thus far!  Thanks Sylvia for the inspiration!

Friday, September 16, 2011

MDS 029 Good Friend Scrapbook Page

Background paper – cardstock – Textured Cardstock – Wild Wasabi.
Stamps – All Scallops – 4 - change color – Marina Mist - Drop Shadow – Opacity 45 Blur 9.  Place at the top of your page.

Embellishment – Staple and Stitching – chocolate chip zigzag.  Place on top of the scallop with a little hanging over on the left.  To cover up the remaining stitching:
Page before adding Photo boxes
Punch - square – resize to make a narrow rectangle to cover what stitching you don’t want – match color – click anywhere on the wasabi green.  Click on the stitching.  Hold your shift key down & click on the scallop - Arrange – Group.  Now they are tied together.  You can move it wherever you want on your page without it coming apart.  Just remember to move your rectangle too.  Repeat – make one longer scallop by joining two together and one shorter one.  Cover up what you don’t want by using your square punch.  Add a white zigzag stitching line across the bottom of your page.
Embellishment – Basic Pearls & Rhinestones – 4th image – enlarge it.  Copy & paste to make another one the same size.  Place where you want them.  Click on one rhinestone.  Hold your shift key down & click on the other one – Align (in the Toolbar across the top) – choose top or bottom. 

Background paper - Designer Series Paper – Designer Kits – 2010 New Color Patterns – Early Expresso Polka Dots - Add as Page Layer – Double click & resize to about 5.5x4 inches.  Repeat to make another one about 4x7 inches.
Punch – scallop circle – paper fill – Marina Mist wallpaper - rotate right - Drop Shadow – Opacity 65 Blur medium – mat – white size 2.  Copy & paste to make a total of 3.  Enlarge if you want.
Stamps – Good Friend – flower - change color – white - Drop Shadow – Opacity 45 Blur 9.  Copy & paste to make a total of 3.  Also add the Good Friend text - change color – Early Expresso.
Copy & paste one of the Rhinestones you have one your page.  Set it on a white flower - Click on the rhinestone.  Hold your shift key down & click on the flower – Align (in the Toolbar across the top) – center - Arrange – Group.  Now they are tied together.  You can move it wherever you want on your page without it coming apart.  Repeat for the other two flowers.

Stamps – One of a Kind – three flowers - change color – So Saffron - Drop Shadow – Opacity 45 Blur 9.  Copy & paste to make a total of 3.  Rotate, flip or mirror to your liking.

If you have just stumbled on my Blog, type ‘MDS Scrap Page’ in the Search Box (top left corner) to see what we have been doing. I am using Windows 7 so you may need to click on HELP (across the top of the program), My Digital Studio Help if you are using a different Windows than me. Watch for NEW Scrap Pages posted every Friday.

Friday, September 9, 2011

MDS 028 Birthday Wishes Scrapbook Page

This is a 12x12 page.
Started snooping around for some Page Maps.  There are lots of great ideas out there.  I’m going to try one from My Little Sketch Blook.  I can’t find the original page I printed out but it’s there somewhere.
If you have just stumbled on my Blog, type ‘MDS Scrap Page’ in the Search Box (top left corner) to see what we have been doing.  I am using Windows 7 so you may need to click on HELP (across the top of the program), My Digital Studio Help if you are using a different Windows than me.   Watch for NEW Scrap Pages posted every Friday.

Background paper – cardstock – Textured Cardstock – Chocolate Chip.

Punch – Curly Label – resize to fit half the page width – paper fill – DK – Play Date #5 – copy & paste to make 3 more.
This is what your page will look like.

Background paper - Designer Series Paper – Designer Kits – Play Date #11 - Add as Page Layer – Double click & resize to 10x10”.  Set on top of your punches – drop shadow.

Embellishment – Staples & Stitching – Chocolate Chip zigzag – rotate & place on left side of page.

Background paper - Designer Series Paper – Designer Kits – Play Date #7 - Add as Page Layer – Double click & resize to 7x9” – rotate to minus 15 – drop shadow.

Punch – Word Window – resize to your liking - color fill – Chocolate Chip - drop shadow.
Page before adding Photo boxes.

Add a text box using the square punch - color fill – Real Red – mat in Chocolate Chip - drop shadow.

Embellishment - Designer Kits – Play Date – flowers – add your choice.

Stamps – Watercolor Trio – Birthday Wishes - change color – Chocolate Chip - drop shadow.

Friday, September 2, 2011

MDS 027 Back to School Scrapbook Page

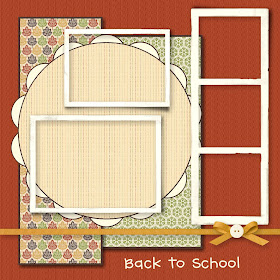
Page before adding Photo boxes.
Doesn't really feel like fall just yet but we'll do a Fall page anyways.If you have just stumbled on my Blog, type ‘MDS Scrap Page’ in the Search Box (top left corner) to see what we have been doing.  I am using Windows 7 so you may need to click on HELP (across the top of the program), My Digital Studio Help if you are using a different Windows than me.   Watch for NEW Scrap Pages posted every Friday.

Background paper – cardstock – Textured Cardstock – Cajun Craze.

Background paper - Designer Series Paper – Designer Kits – Autumn Spice #5 - Add as Page Layer – Double click & resize to 3.5 x 10” – ok - mat – Early Espresso – ok.

Background paper - Designer Series Paper – Designer Kits – Autumn Spice #1 - Add as Page Layer – Double click & resize to 4.5 x 9” - mat - Early Espresso – Arrange – send to back.
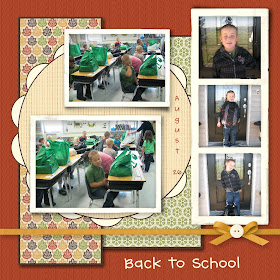
This is a 12x12 page.
Embellishment – grosgrain ribbon – More Mustard.

Embellishment – grosgrain bow – More Mustard.

Embellishment – round buttons – Very Vanilla.

Punch – scallop circle – resize quite large - color fill – Very Vanilla - mat - Early Espresso.

Punch – circle – resize to fit punch - paper fill – Autumn Spice #7 - mat - Early Espresso.

Embellishment – Designer Kits – Downtown Grunge – triple frame – rotate – resize.

Embellishment – Designer Kits – Downtown Grunge – one large & one small single frame.

Click on one Embellishment - Drop Shadow – Opacity 45 Blur 9 (or whatever you want) – on this page.  Repeat by clicking on one Punch, then on one of your photos.

Text – CK Handprint – size 58 – change color – Very Vanilla.