If you have never made a card before, you will love these
One Hour Card Class workshops! We will complete a card with a matching
envelope – ready for the mail! I host
card classes every Thursday, Friday and Saturday. You pick the day and the time that suits you.
Message or email me for more info. I hope you will consider joining me as
we learn how to get the very best from the products that we buy. You can order SU! products online and have
them shipped directly to your door. Simply click on the “Shop Now” button in my
banner (or I can order for you). I would be most happy to be your Canadian
demonstrator.
What does a
Paper Pumpkin Subscriber get?
A little red box (although November’s box was a pretty
blue!) automatically delivered to your doorstep each month full of creativity
for you to enjoy. Kits include
instructions with everything you need to make the suggested projects or you can
create your own alternative projects!
Every kit comes with an exclusive stamp set to use over
and over!
They also send at least one Classic Stampin’ Spot with
every kit. The colors don’t repeat in a 12-month period, so it’s easy to build
a collection of colorful ink.
Every new subscriber receives a clear block (size D) with
their first kit to help them get started and to use throughout their
subscription.
Every month, SU! shares a video to quickly demonstrate
how to assemble each kit.
There are many other perks!
This month’s kit contains supplies for 8 note cards and envelopes.
*8 white note card bases
*8 printed blue envelopes
*12 laser cut sheets
*8 vellum sheets
*4 yards white and silver baker’s twine
*30 white sequins
* 75 mini dimensionals
*125 adhesive dots
And it also came with:
*Wonderful Winterland Photopolymer Stamp Set
*Dapper Denim and Old Olive ink spots
This kit comes with scored note cards. As cute as they are, we will make them into a
regular size cards.
Pool Party
card. Sign the back.
Pool Party panel 5” x 4-1/4”. Run through the Softly Falling embossing folder. Adhere to card front. Set aside.
Since the envelopes supplied in the kit will no longer
fit, cut them to 3-1/4” x 4-1/2” for later.
Set aside.
Cut the white note cards in half to make a panel 3” x
4-1/4”.
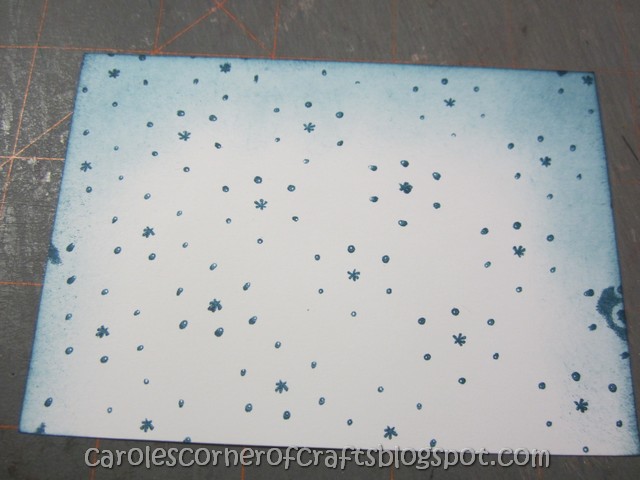
Over stamp with the snowflakes in Dapper Denim ink – touch lightly as the background of the stamp
tends to touch down. Sponge the top and
both sides in a circular motion with Dapper Denim ink – no need to sponge the
bottom. Heat to dry.
Gently remove the laser cut dies from their sheets. Sponge the row of houses in Pool Party ink in a circular motion. Apply gentle pressure to the trees and
buildings. Heat to dry. Adhere to white panel. Set aside.
Squirt a bit of Tombow
glue on the Silicone Craft Sheet.
Pounce in it with a sponge
to pick up the glue.
Pounce on the wrong side of the vellum to transfer the
glue then adhere vellum to the white panel.
This is called the Glue Sponging
technique. Keep this sponge in a
sealed container until you are done using it then wash and let it dry. Clean your Silicone sheet with baby wipes. Trim panel if necessary. Set aside.
Sponge the single house die with Soft Sky ink. Use snail adhesive to adhere to the vellum
panel. Trim panel if necessary.
Tie 12” of baker’s twine about 1/4” from the top of the
vellum panel. Tie into a knot to the
left side. Set aside.
Stamp the trees in Old
Olive and the phrase in Dapper Denim
ink on the white die. Sponge edges in
Pool Party ink. Pounce lightly around
the trees. Add dimensionals across the bottom, the sides and behind each tree. Add
to the vellum panel. Trim if
necessary.
Trim the Dapper Denim envelope panel to fit the vellum
panel if necessary. Adhere to tree panel
then to card front. Set aside.
Cut 7” of glitter
Pool Party ribbon. Make a bow using
the bow maker hubby made me. Adhere just
above the baker twine knot with glue dots. Trim ribbon and baker’s twine.
Apply three sequins with glue dots or tombow glue.
Fold a piece of writing
tablet paper in half. Stamp with a
phrase and images if desired. Adhere to
inside of the card.
Stamp a purchased
envelope to match.


If you have never made a card before, you will love these
One Hour Card Class workshops! We will complete a card with a matching
envelope – ready for the mail! I host
card classes every Thursday, Friday and Saturday. You pick the day and the time that suits you.
Message or email me for more info. I hope you will consider joining me as
we learn how to get the very best from the products that we buy. You can order SU! products online and have
them shipped directly to your door. Simply click on the “Shop Now” button in my
banner (or I can order for you). I would be most happy to be your Canadian
demonstrator.
What does a
Paper Pumpkin Subscriber get?
A little red box (although November’s box was a pretty
blue!) automatically delivered to your doorstep each month full of creativity
for you to enjoy. Kits include
instructions with everything you need to make the suggested projects or you can
create your own alternative projects!
Every kit comes with an exclusive stamp set to use over
and over!
They also send at least one Classic Stampin’ Spot with
every kit. The colors don’t repeat in a 12-month period, so it’s easy to build
a collection of colorful ink.
Every new subscriber receives a clear block (size D) with
their first kit to help them get started and to use throughout their
subscription.
Every month, SU! shares a video to quickly demonstrate
how to assemble each kit.
There are many other perks!
This month’s kit contains supplies for 8 note cards and envelopes.
*8 white note card bases
*8 printed blue envelopes
*12 laser cut sheets
*8 vellum sheets
*4 yards white and silver baker’s twine
*30 white sequins
* 75 mini dimensionals
*125 adhesive dots
And it also came with:
*Wonderful Winterland Photopolymer Stamp Set
*Dapper Denim and Old Olive ink spots
This kit comes with scored note cards. As cute as they are, we will make them into a
regular size cards.
Pool Party
card. Sign the back.
Pool Party panel 5” x 4-1/4”. Run through the Softly Falling embossing folder. Adhere to card front. Set aside.
Since the envelopes supplied in the kit will no longer
fit, cut them to 3-1/4” x 4-1/2” for later.
Set aside.
Cut the white note cards in half to make a panel 3” x
4-1/4”.
Over stamp with the snowflakes in Dapper Denim ink – touch lightly as the background of the stamp
tends to touch down. Sponge the top and
both sides in a circular motion with Dapper Denim ink – no need to sponge the
bottom. Heat to dry.
Gently remove the laser cut dies from their sheets. Sponge the row of houses in Pool Party ink in a circular motion. Apply gentle pressure to the trees and
buildings. Heat to dry. Adhere to white panel. Set aside.
Squirt a bit of Tombow
glue on the Silicone Craft Sheet.
Pounce in it with a sponge
to pick up the glue.
Pounce on the wrong side of the vellum to transfer the
glue then adhere vellum to the white panel.
This is called the Glue Sponging
technique. Keep this sponge in a
sealed container until you are done using it then wash and let it dry. Clean your Silicone sheet with baby wipes. Trim panel if necessary. Set aside.
Sponge the single house die with Soft Sky ink. Use snail adhesive to adhere to the vellum
panel. Trim panel if necessary.
Tie 12” of baker’s twine about 1/4” from the top of the
vellum panel. Tie into a knot to the
left side. Set aside.
Stamp the trees in Old
Olive and the phrase in Dapper Denim
ink on the white die. Sponge edges in
Pool Party ink. Pounce lightly around
the trees. Add dimensionals across the bottom, the sides and behind each tree. Add
to the vellum panel. Trim if
necessary.
Trim the Dapper Denim envelope panel to fit the vellum
panel if necessary. Adhere to tree panel
then to card front. Set aside.
Cut 7” of glitter
Pool Party ribbon. Make a bow using
the bow maker hubby made me. Adhere just
above the baker twine knot with glue dots. Trim ribbon and baker’s twine.
Apply three sequins with glue dots or tombow glue.
Fold a piece of writing
tablet paper in half. Stamp with a
phrase and images if desired. Adhere to
inside of the card.
Stamp a purchased
envelope to match.