I used the Pumpkin and hat pattern from
Joan Hinds book, Doll Costume Dress Up that I received as a gift from my
sister. I did do some changes of
course. I cut one front and two backs
from orange broadcloth then I cut myself a partial lining for the front and
back.
Sew shoulder seams. Repeat for lining. Place lining to main with right sides
together. Sew around neck and armholes. Pink or clip.
Pull the backs to the front through the
shoulders. Press. Set aside.
Trace face onto fusible web. Adhere to black fabric. Place face pieces to pumpkin front and press
in place. Straight stitch around each
piece.
Open lining and sew side seams. Serge to clean finish bottom of lining,
center back seams and hem.
Topstitch around neck and armholes. Hem bottom at ¼”.
Insert 11” of 1/8” elastic through
hem. Sew center back seam closed about
3.5” from hem. Add Velcro.
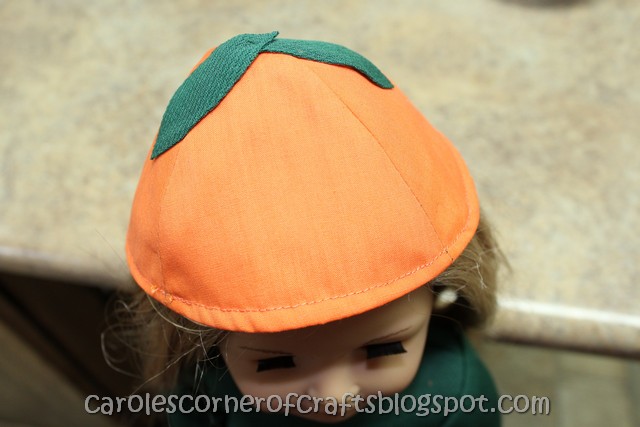
I followed Joan Hinds pattern for the
cap. I didn’t have a pipe cleaner to use
as part of the leaf/stem so I just sewed two leaves at the center top.
I used the free pattern from TheScientific Seamstress Blog (called Tee Time from her February 7, 2011 post) for
the top. I love how she has hemmed
everything before she cuts it out! Very clever!
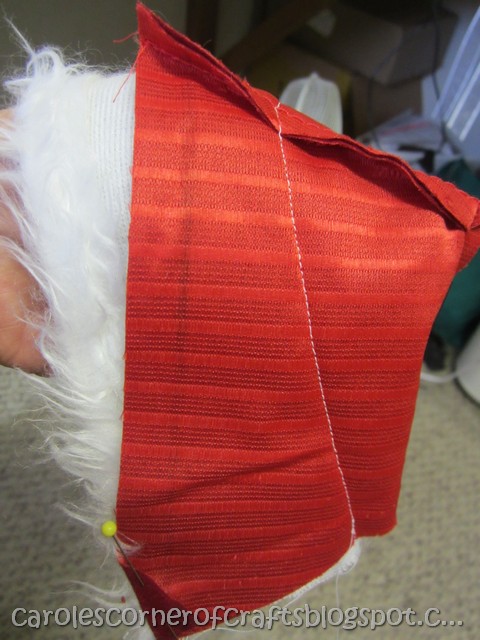
Stitch inside the seam allowance. Use a regular length stitch, start sewing
about 1” from the end of your sleeve. Keep your index finger pressed against
the back of the presser foot, catching the fabric you've just sewn and forcing
it against the presser foot.
Hold tightly, causing the fabric to
bunch up. Keep holding and stitching, until there's so much fabric it spills
over your finger.
Release, and continue stitching and
"bunching" until you're 1" from the other end of the sleeve cap.
This process eases in the excess length
of the sleeve cap without any nasty little pleats.
Now, fit the sleeve into the armhole.
The sleeve may even be a little too small. If so, just stretch it to fit.
As you can see, without even pressing,
the sleeve fits perfect!
I cut the collar 1.75” x 11”, stretched as
I sewed in place then cut off the excess.
I used the same pattern as the scrubs in
AG013 since it is my favorite pants pattern (just type ‘scrubs’ in the search box at
the top left corner of my blog to find it).
If you would like one, click "Like" on my American Girl Doll Creations by
Carole Facebook page as the ordering info is there.
Stay tuned for more American Girl doll
tutorials or better yet, sign up to my Blog so you won’t miss any of my AG
posts!
Please leave a comment below to let me
know if you enjoyed this!

I used the Pumpkin and hat pattern from
Joan Hinds book, Doll Costume Dress Up that I received as a gift from my
sister. I did do some changes of
course. I cut one front and two backs
from orange broadcloth then I cut myself a partial lining for the front and
back.
Sew shoulder seams. Repeat for lining. Place lining to main with right sides
together. Sew around neck and armholes. Pink or clip.
Pull the backs to the front through the
shoulders. Press. Set aside.
Trace face onto fusible web. Adhere to black fabric. Place face pieces to pumpkin front and press
in place. Straight stitch around each
piece.
Open lining and sew side seams. Serge to clean finish bottom of lining,
center back seams and hem.
Topstitch around neck and armholes. Hem bottom at ¼”.
Insert 11” of 1/8” elastic through
hem. Sew center back seam closed about
3.5” from hem. Add Velcro.
I followed Joan Hinds pattern for the
cap. I didn’t have a pipe cleaner to use
as part of the leaf/stem so I just sewed two leaves at the center top.
I used the free pattern from TheScientific Seamstress Blog (called Tee Time from her February 7, 2011 post) for
the top. I love how she has hemmed
everything before she cuts it out! Very clever!
Stitch inside the seam allowance. Use a regular length stitch, start sewing
about 1” from the end of your sleeve. Keep your index finger pressed against
the back of the presser foot, catching the fabric you've just sewn and forcing
it against the presser foot.
Hold tightly, causing the fabric to
bunch up. Keep holding and stitching, until there's so much fabric it spills
over your finger.
Release, and continue stitching and
"bunching" until you're 1" from the other end of the sleeve cap.
This process eases in the excess length
of the sleeve cap without any nasty little pleats.
Now, fit the sleeve into the armhole.
The sleeve may even be a little too small. If so, just stretch it to fit.
As you can see, without even pressing,
the sleeve fits perfect!
I cut the collar 1.75” x 11”, stretched as
I sewed in place then cut off the excess.
I used the same pattern as the scrubs in
AG013 since it is my favorite pants pattern (just type ‘scrubs’ in the search box at
the top left corner of my blog to find it).
If you would like one, click "Like" on my American Girl Doll Creations by
Carole Facebook page as the ordering info is there.
Stay tuned for more American Girl doll
tutorials or better yet, sign up to my Blog so you won’t miss any of my AG
posts!
Please leave a comment below to let me
know if you enjoyed this!